E1. Fundamentals of AR
Learning Outcomes
- Differentiate AR from VR and explain its role in engineering applications. Before class, review how AR uses spatial overlays to enhance real-world tasks and provide in-context information.
- Distinguish handheld mobile AR, optical see-through AR, and video passthrough AR. Ahead of the session, compare how phones/tablets (ARKit/ARCore), optical headsets (HoloLens 2, Magic Leap 2), and passthrough headsets (Meta Quest, Apple Vision Pro, Varjo XR) present and track digital content.
- Describe the AR development lifecycle and identify core Unity components for AR scenes. To prepare, read through the “Prototyping and Creation” stage and note that AR Foundation scenes require
AR SessionandXR Origin(XR Origin (Mobile AR)for handheld AR).- Explain how AR Foundation depends on provider plug-ins such as ARCore, ARKit, Unity OpenXR: Meta, visionOS, or OpenXR-based providers. Familiarize yourself with XR Plug-in Management and which provider enables each build target before designing a tutorial.
- Identify essential AR software tools and their functions in Unity development. Review AR Foundation, XR Interaction Toolkit, Input System, and XR Simulation, and follow installation steps that enable AR features for your target platform.
- Compare major AR hardware platforms and their capabilities. Summarize tracking, field of view, interaction, and ergonomics across mobile AR (iOS/ARKit, Android/ARCore), passthrough AR (Meta Quest as the primary course headset path), optical see-through AR (HoloLens 2, Magic Leap 2), and high-end passthrough context devices (Apple Vision Pro, Varjo XR).
- Evaluate AR alignment, tracking stability, occlusion, safety, and real-world task suitability before trusting an overlay. Reflect on when digital instructions could obstruct hazards or misrepresent physical scale.
- Explain why AR can be advantageous over VR in certain engineering scenarios. Come ready with one example where real-world context matters more than full immersion.
What Is AR?
Augmented Reality (AR) is an XR technology that overlays digital content onto the user’s view of the real world. Unlike VR, which replaces the environment entirely with a computer-generated simulation, AR enriches the physical environment with interactive digital layers. The term “augmented” signifies that the real world is enhanced with additional information, helping users gain deeper insights and a more engaging perspective of their surroundings. In this course, AR includes two main development paths: mobile AR on phones/tablets through AR Foundation, ARKit, and ARCore; and headset-based passthrough AR on Meta Quest, where the real world is shown through camera passthrough and Unity overlays digital content on top. Optical see-through devices such as HoloLens 2 and Magic Leap 2 remain important comparison platforms, but the hands-on passthrough AR tutorials will focus on Meta Quest rather than Magic Leap development. Key features of AR include:
- Spatial Mapping and Tracking: AR systems must continuously capture and analyze data from the physical environment. This involves using sensors (e.g., cameras, depth sensors, LiDAR) to map surroundings and track the precise location and orientation of both the user and digital objects in real time. When a user navigates through the logistics station, AR devices can detect walls, racks, and forklifts to create a spatial mesh. A drone flying in the warehouse can be visualized following real spatial constraints, weaving between shelves without clipping through them—thanks to accurate spatial tracking.
- Registration and Alignment: Accurate alignment or registration of virtual content with real-world objects is essential. This ensures that digital overlays appear to interact correctly with physical elements, maintaining spatial coherence even as the user moves. Tracking drift must be considered in assembly and inspection tasks—re-anchor or reset when alignment degrades. Using image markers, user can place a virtual 3D printer on a physical table for simulation and educational purposes. Once anchored, the virtual 3D printer remains aligned with the table surface, though students should verify scale and registration on the target device.
- Environmental Understanding: AR technology leverages computer vision and machine learning to recognize and interpret objects and surfaces in the environment. This understanding is used to determine occlusion (which objects should appear in front or behind) and to provide realistic integration of virtual content, including proper shadows and lighting. The virtual quadruped robot can walk across the physical floor while being occluded correctly by tables and furniture and stopped when colliding with physical obstacles. Occlusion and meshing improve visual believability but are not proof of safe physical collision behavior—validate task safety separately in the real environment.
- Real-Time Performance: Because AR experiences require instantaneous integration of digital data with a live feed of the physical world, low-latency processing is crucial. This real-time capability enables smooth interactions and minimizes lag that could disrupt the immersive experience. During AR-based robotic machine tending training and simulation, users can interact with virtual robot arms and their digital twin in sync with real machine cycles. Any noticeable delay would make the overlay useless, so performance optimization is a key learning outcome.
- Sensor Fusion: Combining data from multiple sensors (such as cameras, gyroscopes, accelerometers) enhances the system’s reliability and accuracy. Sensor fusion allows AR applications to operate in varying conditions and environments, improving robustness in tracking and spatial awareness. The virtual mobile robot in the assembly station can drive across the physical floor, avoiding virtual and real obstacles using data fused from the AR headset’s IMU, camera feed, and depth sensors.
- User Interaction and Interface: An intuitive and responsive interface is fundamental. AR applications often utilize gesture recognition, voice commands, or touch inputs, making the interaction smooth and natural. Designing user-friendly interfaces enhances the seamless integration of digital elements into the physical world. Users can use hand gestures to rotate, assemble, or disassemble a virtual V8 engine placed on a physical engine block. With hand tracking, they manipulate parts as if they were real—strengthening spatial reasoning, learning, and ergonomic interface design skills.
- Context Awareness: AR systems need to understand and interpret contextual data, including location, orientation, and the dynamic state of the task, the user, and the environment. This awareness enables them to provide meaningful, context-sensitive overlays and interactions that enhance the user’s experience. When standing near a physical welding station, AR headsets can automatically trigger a safety overlay that visualizes heat zones, danger areas, and robotic motion paths, enabled by context-sensitive UI design and environment-based triggers.
In a physical factory, AR can enhance real-world factory operations by overlaying virtual content directly onto physical environments. For instance, at the engine assembly station, users can view holographic engine components precisely aligned with a physical engine platform and its components, along with step-by-step instructions and part labels. Whether on a phone, tablet, or headset, overlays must be checked for real-world scale, registration stability, and task safety—digital instructions should not obstruct hazards or operator awareness. This real-time augmentation improves spatial reasoning, guides accurate assembly, and reduces errors—turning AR into an interactive, context-aware assistant that supports hands-on engineering tasks.
AR Development Lifecycle
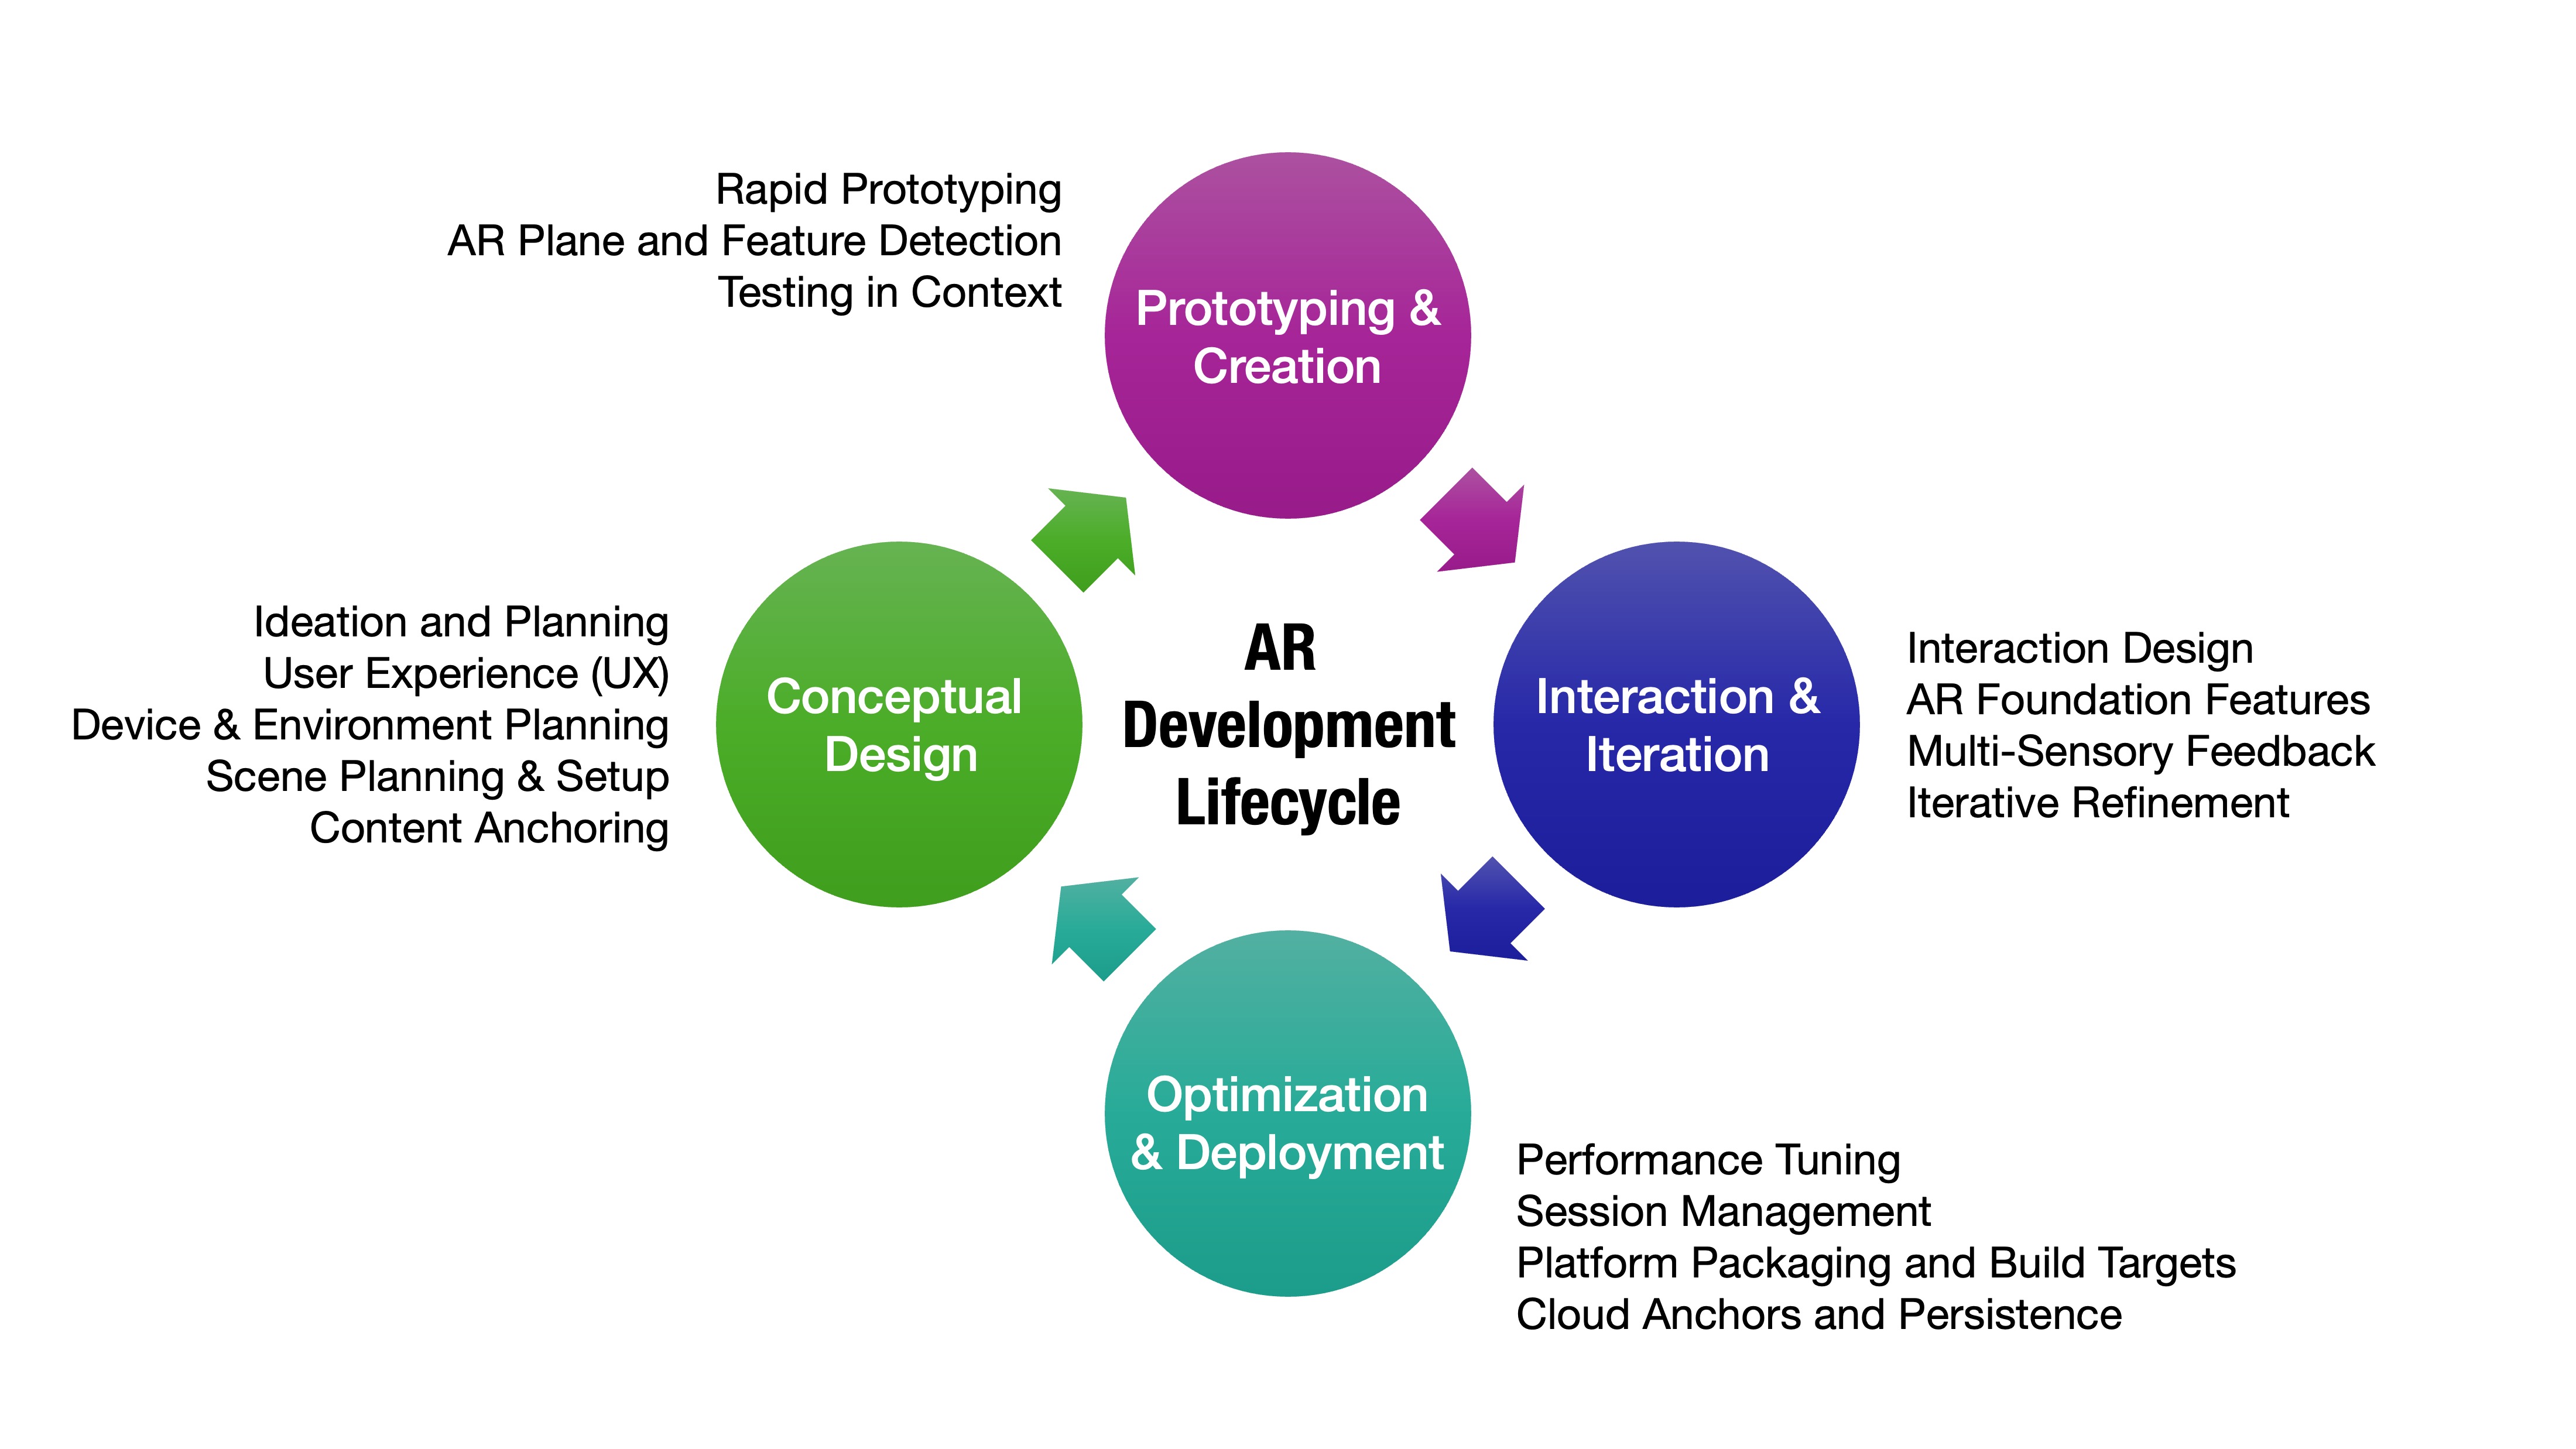
AR development in Unity follows a structured lifecycle that seamlessly integrates digital content into the physical world using AR Foundation. From early planning to final deployment, successful AR projects rely on well-defined goals, intuitive user interfaces, and real-time spatial awareness. Leveraging features like plane detection, image tracking, and environmental probes, developers can create context-aware experiences that feel natural, responsive, and tightly aligned with the user’s physical environment.
Conceptual Design
Strong AR projects begin with clear objectives, hardware considerations, and spatial planning that considers both physical context and digital overlays. Defining how digital content enhances real-world tasks from the start ensures a more seamless and purposeful user experience throughout development.
- Ideation and Planning: Define the purpose of the AR experience—educational overlays, guided procedures, or context-sensitive data visualization. In a factory, handheld AR can be used to guide users through robotic welding procedures by overlaying safety zones and machine statuses directly on the physical equipment on the shop floor. Clear goals at this stage also help determine the scope of features, UI complexity, and expected hardware support.
- User Experience (UX): Design interactions appropriate to the AR platform—touch-based for mobile devices and controller, hand, ray, or poke interaction for Quest passthrough AR. On a tablet, users can tap virtual UI buttons anchored to real racks in the logistics station. On a Quest passthrough headset, they can use XRI patterns similar to Module D. Ensure interactions are intuitive and don’t obstruct users’ view of the real-world workspace.
- Device and Environment Planning: Choose between handheld AR and headset passthrough AR based on use case, spatial requirements, and user mobility. Handheld AR is used for scanning QR/image markers on tables to display anchored robots. Meta Quest passthrough AR supports free movement and XRI interaction in complex tasks like engine assembly or troubleshooting. Environmental conditions—like lighting, reflective surfaces, and physical obstacles—should also be considered early.
- Scene Planning and Setup: Begin with a grounded AR Foundation scene setup. For AR Foundation, each AR scene requires an
AR Sessionand anXR Origin. For mobile AR, useXR Origin (Mobile AR); for Meta Quest passthrough AR, follow AR Foundation scene setup and configure the Unity OpenXR: Meta provider and passthrough features. AnXR Origincan be configured to detect planes in the welding cell where users can place a virtual welding robot in alignment with the physical floor. For engineering overlays, verify real-world scale, registration stability, drift, occlusion behavior, lighting conditions, and task safety in the actual environment. - Content Anchoring: Determine how digital elements should be registered to the real world—using surface detection, image markers, or persistent anchors. The quadruped robot is spawned using plane detection and remains fixed to the detected floor even as the user walks around, enhancing realism and spatial coherence. Anchoring methods must be tested for stability and robustness, especially when devices are restarted or tracking resets.
Prototyping and Creation
In this phase, developers use quick iterations to validate AR interactions, surface detection, and user flow. Rapid prototyping helps uncover design flaws and spatial interaction issues before committing to high-fidelity content.
- Rapid Prototyping: Use mock assets and simple UI elements to block out interactions and spatial anchors. A prototype scene places virtual CNC parts on a physical table by scanning an image marker—used in XFactory to simulate inspection tasks using various virtual measurement gauges. Early prototypes often skip visuals and focus on validating tracking, placement, and UI flow in real environments.
- AR Plane and Feature Detection: Enable plane detection and raycasting to place objects in the physical world. Use debugging tools like visualizers and gizmos. Users can use handheld AR to place and resize a virtual display on the physical wall using detected vertical planes. It is essential to test detection robustness under varied lighting and surface textures.
- Testing in Context: Use XR Simulation for early iteration in the Editor, but always validate behavior on physical AR devices early and often. Developers test placing the engine block in AR over a physical engine platform using both mobile AR and Quest passthrough AR, validating position drift and lighting differences between platforms. This step also includes assessing user ergonomics and real-world workflow integration.
Interaction and Iteration
This stage focuses on responsive interactions using AR Foundation’s tracking systems, Unity’s Input System, and gesture or touch input logic. Testing and refining interactions ensures that the AR content feels natural, timely, and anchored in the real world.
- Interaction Design: Use screen-based inputs (tap, swipe) on mobile AR and controller, ray, poke, grab, or hand-tracking inputs on Quest passthrough AR for object manipulation, menu control, and system feedback. For example, users can tap to spawn or assemble parts of an engine on a phone, or use
Near-Far Interactorand XRI UI on Quest. Interaction modes vary by provider and hardware—design fallbacks such as touch for mobile, controller/ray for Quest, and hand tracking only when supported and tested on device. - AR Foundation Features: Integrate subsystems like plane detection, image tracking, object tracking, and occlusion using AR Foundation components. Check which features your chosen provider supports before designing a tutorial. The mobile robot can be placed and tracked in AR via surface detection. Users can observe how it interacts with occlusion meshes like tables, showcasing depth-aware spatial behavior. Leveraging these features adds realism and improves spatial interaction fidelity.
- Multi-Sensory Feedback: Use sound and visual feedback for actions—snap sounds, highlights, and haptics when supported. When placing a virtual drone simulates box scanning in a physical logistics station, a click sound and an adaptive animation can confirm alignment and distance. Vibrations or audio pings can guide users during complex tasks or when alignment is off.
- Iterative Refinement: Gather user feedback, tweak interaction distances, improve registration accuracy, and streamline UX. For example, users may prefer a larger, radial UI for the mobile AR app to make button presses easier when anchoring robots to narrow surfaces. Ongoing usability testing helps identify friction points and ensures long-term comfort during extended AR sessions.
Optimization and Deployment
Final polish ensures the AR experience is stable, performant, and cross-platform ready. This phase focuses on packaging for target hardware, optimizing runtime efficiency, and preparing the app for distribution or enterprise deployment. AR prototypes are not validated manufacturing control systems—treat overlays as training and visualization aids until formally validated.
- Performance Tuning: Profile CPU/GPU time, camera/passthrough cost, occlusion/meshing cost, thermal behavior, battery use, tracking stability, and frame rate on the actual target device. Reduce draw calls, optimize shaders, and limit unnecessary raycasting or updates. AR assets can use lightweight materials for mobile AR, while Quest passthrough builds may use LOD groups for distant objects. Adjust update intervals for less-critical background elements to save power and improve responsiveness.
- Session Management: Use
ARSession.Reset()strategically to clear tracking or reload environments. Ensure seamless startup and recovery. When tracking drifts or misaligns during V8 engine assembly, users can reset the session to recalibrate anchors to the image marker beneath the platform. Include safeguards and UI prompts to inform users when resets are necessary. - Platform Packaging and Build Targets: Configure build settings per platform using AR Foundation’s multi-platform support and the correct provider plug-in for each target. Test builds on Android (ARCore), iOS (ARKit), and Meta Quest (OpenXR + Unity OpenXR: Meta). An AR app can be deployed to Android tablets for handheld use and to Quest for passthrough assembly guidance, using platform-specific settings under Unity’s XR Plug-in Management. Build automation and platform-specific prefabs help manage differences in interaction or resolution.
- Cloud Anchors and Persistence (Advanced): For persistent content across sessions or users, integrate cloud anchor services or save/load local anchors. In a collaborative training session, two users can use AR to jointly assemble an engine, with both devices anchored to the same real-world marker using persistent AR anchors. This enables collaborative workflows, spatial memory, and multi-user state synchronization across sessions and locations.
Testing Matrix
| Stage | Purpose |
|---|---|
| XR Simulation | Early AR scene logic, plane/raycast/anchor iteration in the Editor |
| Mobile device build | ARKit/ARCore camera feed, tracking, touch interaction, lighting, thermal behavior |
| Quest Link / Meta Horizon Link | Rapid headset preview for Quest passthrough where supported |
| Android Build and Run on Quest | Final standalone passthrough, input, occlusion, performance, comfort, and thermal validation |
| Real environment test | Final check for lighting, reflective surfaces, physical hazards, scale, and task fit |
Passthrough AR still blocks direct natural vision and can introduce latency or depth mismatch; do not use it for safety-critical real-world machine operation unless the system has been validated.
AR Software
Unity offers a powerful platform for developing cross-device AR applications, supported by AR Foundation and provider plug-ins such as ARKit, ARCore, and Unity OpenXR: Meta. These components manage real-time sensor data, surface detection, device-specific features, and spatial interaction—enabling engineers to build high-fidelity, context-aware AR experiences for mobile AR and Meta Quest passthrough AR.
AI-generated AR instructions often mix older
AR Session Originworkflows, mobile-only AR Foundation setup, Magic Leap or MRTK-specific steps, and Quest passthrough/OpenXR settings. When AR does not work, verify the target platform, provider plug-in, XR Plug-in Management settings,AR Session,XR Origin, camera background/passthrough settings, permissions, and physical device support before rewriting scripts.
AR Foundation
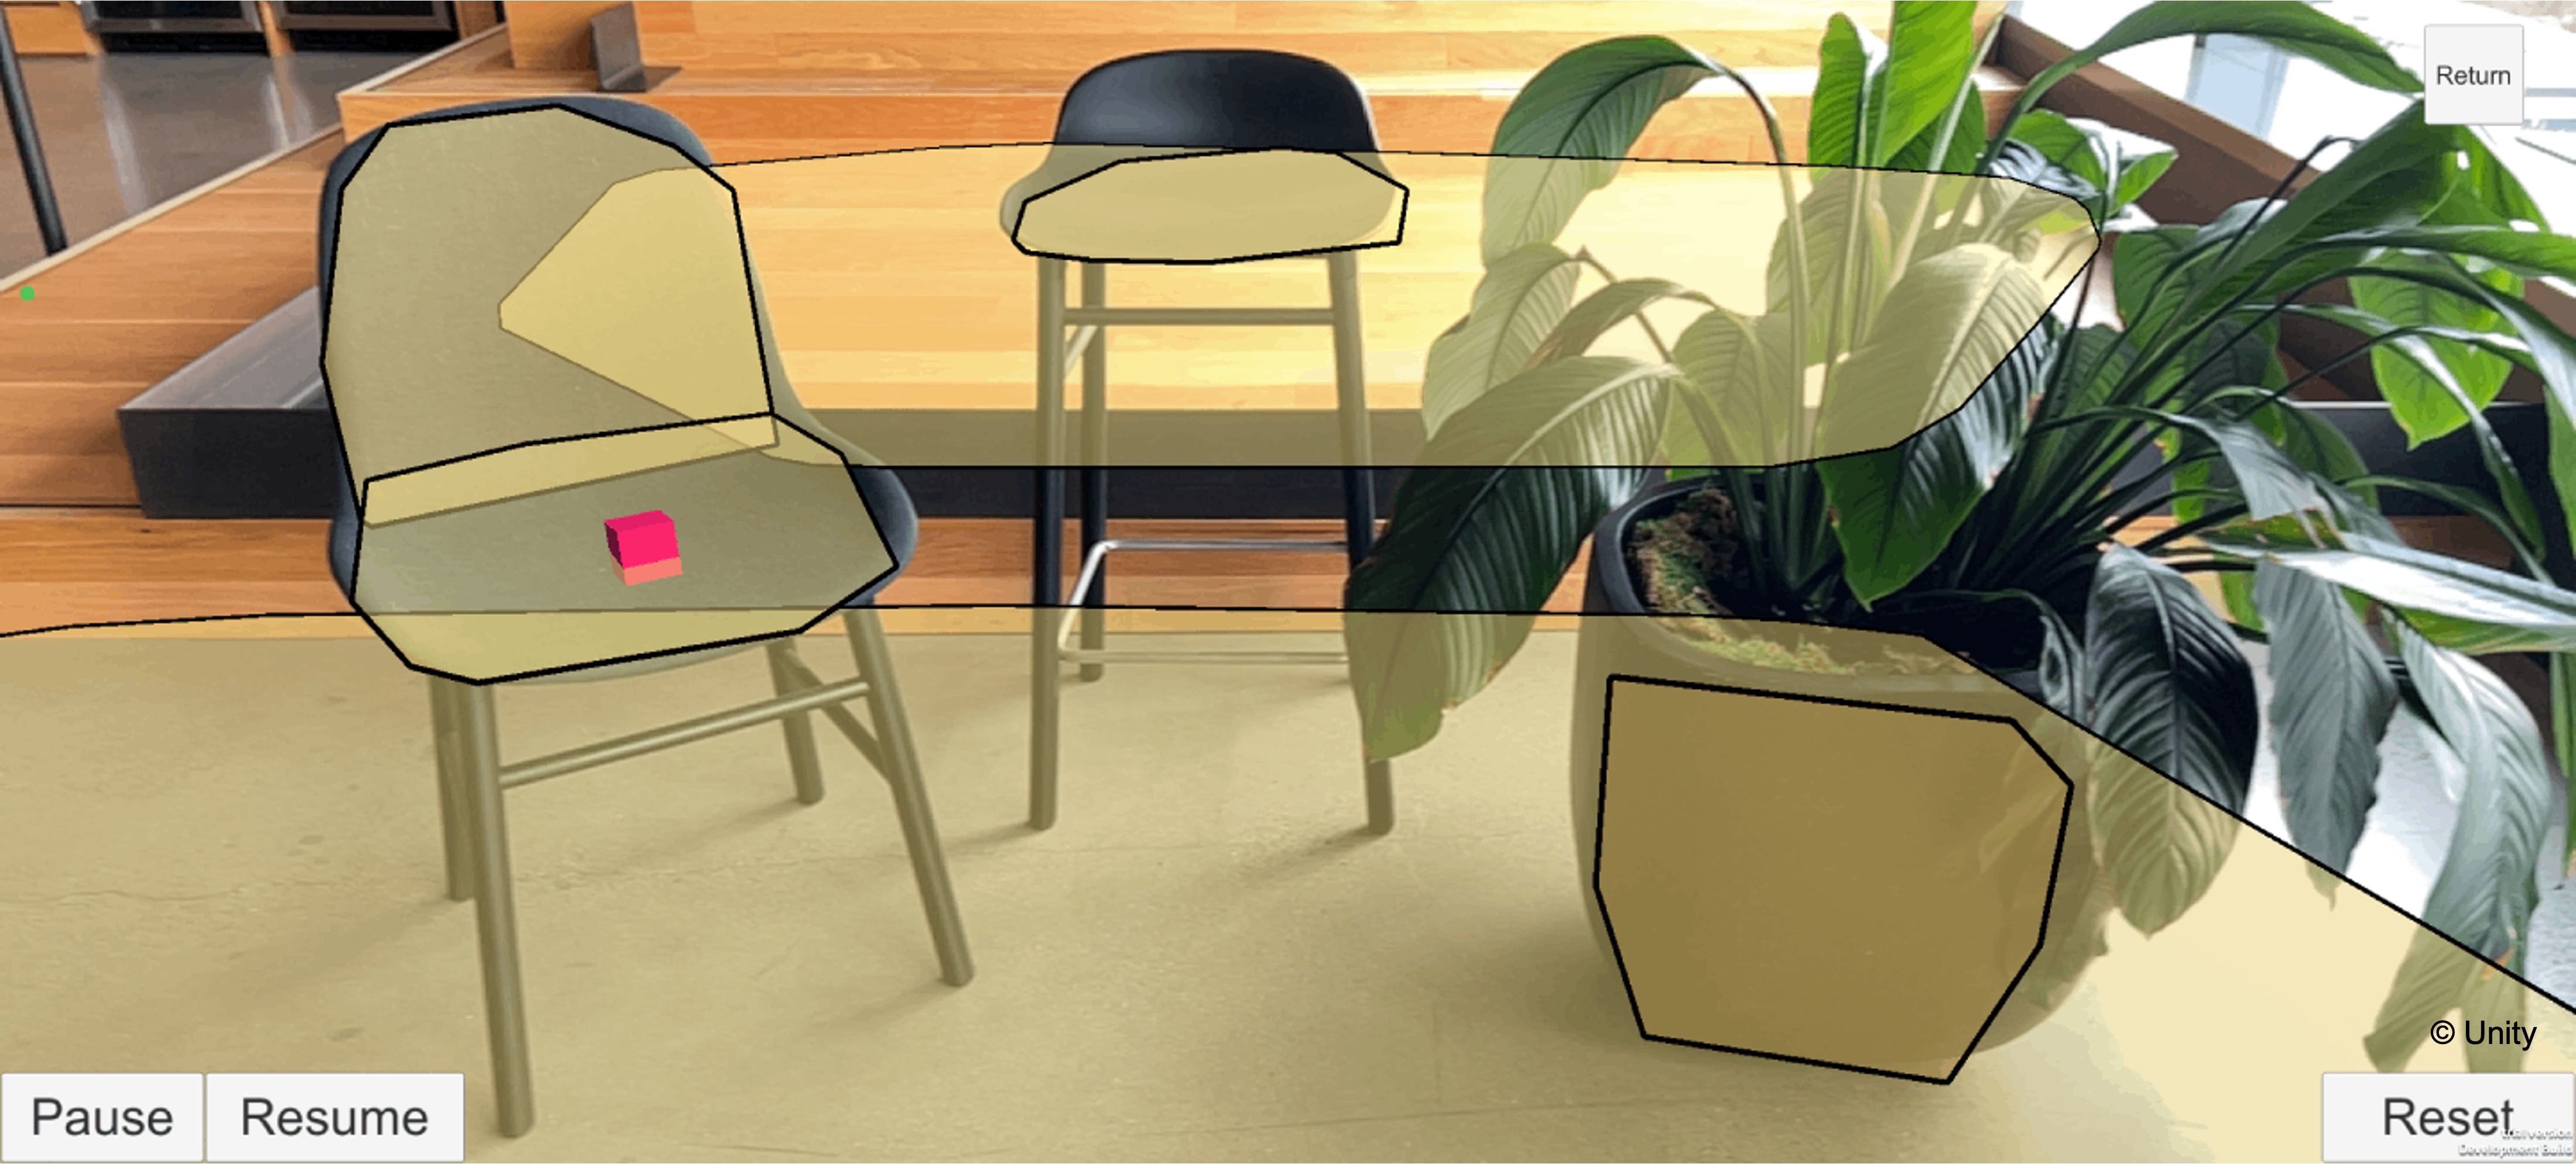
AR Foundation is Unity’s abstraction layer for building AR experiences that run on multiple devices, including iOS (ARKit) and Android (ARCore). AR Foundation does not implement AR features by itself—it depends on provider plug-ins enabled through XR Plug-in Management. Core features include:
- Cross-Platform Abstraction: AR Foundation provides a consistent Unity API while provider plug-ins supply platform-specific AR capabilities. Examples include the Google ARCore XR Plug-in (Android mobile AR), Apple ARKit XR Plug-in (iOS/iPadOS), Apple visionOS XR Plug-in (visionOS), Unity OpenXR: Meta (Meta Quest AR Foundation features), and OpenXR providers where relevant (e.g., HoloLens). Students should check which AR Foundation features are supported by the chosen provider before designing a tutorial.
- Feature Modules: AR Foundation is modular, meaning you can selectively enable subsystems based on your project’s needs—like plane detection for placing objects on real-world surfaces, image tracking for marker-based content, face tracking for AR masks or expressions, and occlusion to let digital objects appear realistically behind real-world ones. These modules are component-based in Unity, making them easy to configure and integrate within the Unity Editor.
- Device Independence: AR Foundation dynamically adapts to each device’s capabilities at runtime. For example, if image tracking is not available on a specific Android device, AR Foundation will automatically disable that subsystem to avoid crashes. This makes it easier to support a wide range of hardware without requiring custom logic for every device. Developers can query device support for features and provide alternate interactions or fallbacks as needed.
- Required Scene Structure: AR scenes require an
AR Sessionand anXR Origin. For mobile AR, useXR Origin (Mobile AR); for Quest passthrough AR, configure OpenXR and Unity OpenXR: Meta passthrough/background features alongside the same AR Foundation managers.
ARKit (iOS)
ARKit is Apple’s native AR SDK for iOS and iPadOS and is the primary handheld AR path for iPhones and iPads in this course. It offers robust tracking, scene understanding, and tight integration with Apple’s hardware ecosystem on supported devices. Developers benefit from advanced sensor data, efficient camera processing, and system-level support for AR content. Core features include:
- LiDAR Support: Provides precise depth sensing and spatial mesh generation for realistic placement and occlusion of virtual objects on supported devices (e.g., iPad Pro, iPhone Pro models).
- People Occlusion: Allows virtual objects to appear naturally behind people in the camera feed, enhancing realism in mixed scenes on supported devices.
- Object & Image Recognition: Supports detection of 2D images (like posters or signs) and 3D reference objects for anchored or triggered AR content.
- World & Face Tracking: Delivers smooth world tracking for stable AR placement and enables real-time face tracking for effects, filters, or expression-driven UI.
Depth, occlusion, image tracking, and lighting support vary by device model, OS version, and provider settings—verify on your target hardware before relying on a feature.
ARCore (Android)
ARCore is Google’s AR platform for Android and is the primary handheld AR path for Android phones and tablets in this course. It uses sensor fusion and computer vision to deliver spatial awareness on supported devices, enabling applications from entertainment to industrial workflows. Core features include:
- Motion Tracking: Combines camera input and IMU data to accurately estimate device movement in 3D space (visual-inertial odometry).
- Environmental HDR: Matches virtual lighting with real-world conditions using real-time light estimation, enhancing photorealism on supported devices.
- Plane Detection & Anchoring: Identifies horizontal and vertical surfaces, allowing developers to place and persist virtual content in real-world space.
- Depth API: Offers real-time depth data for more immersive interactions—like realistic object occlusion and depth-based visual effects on supported devices.
OpenXR
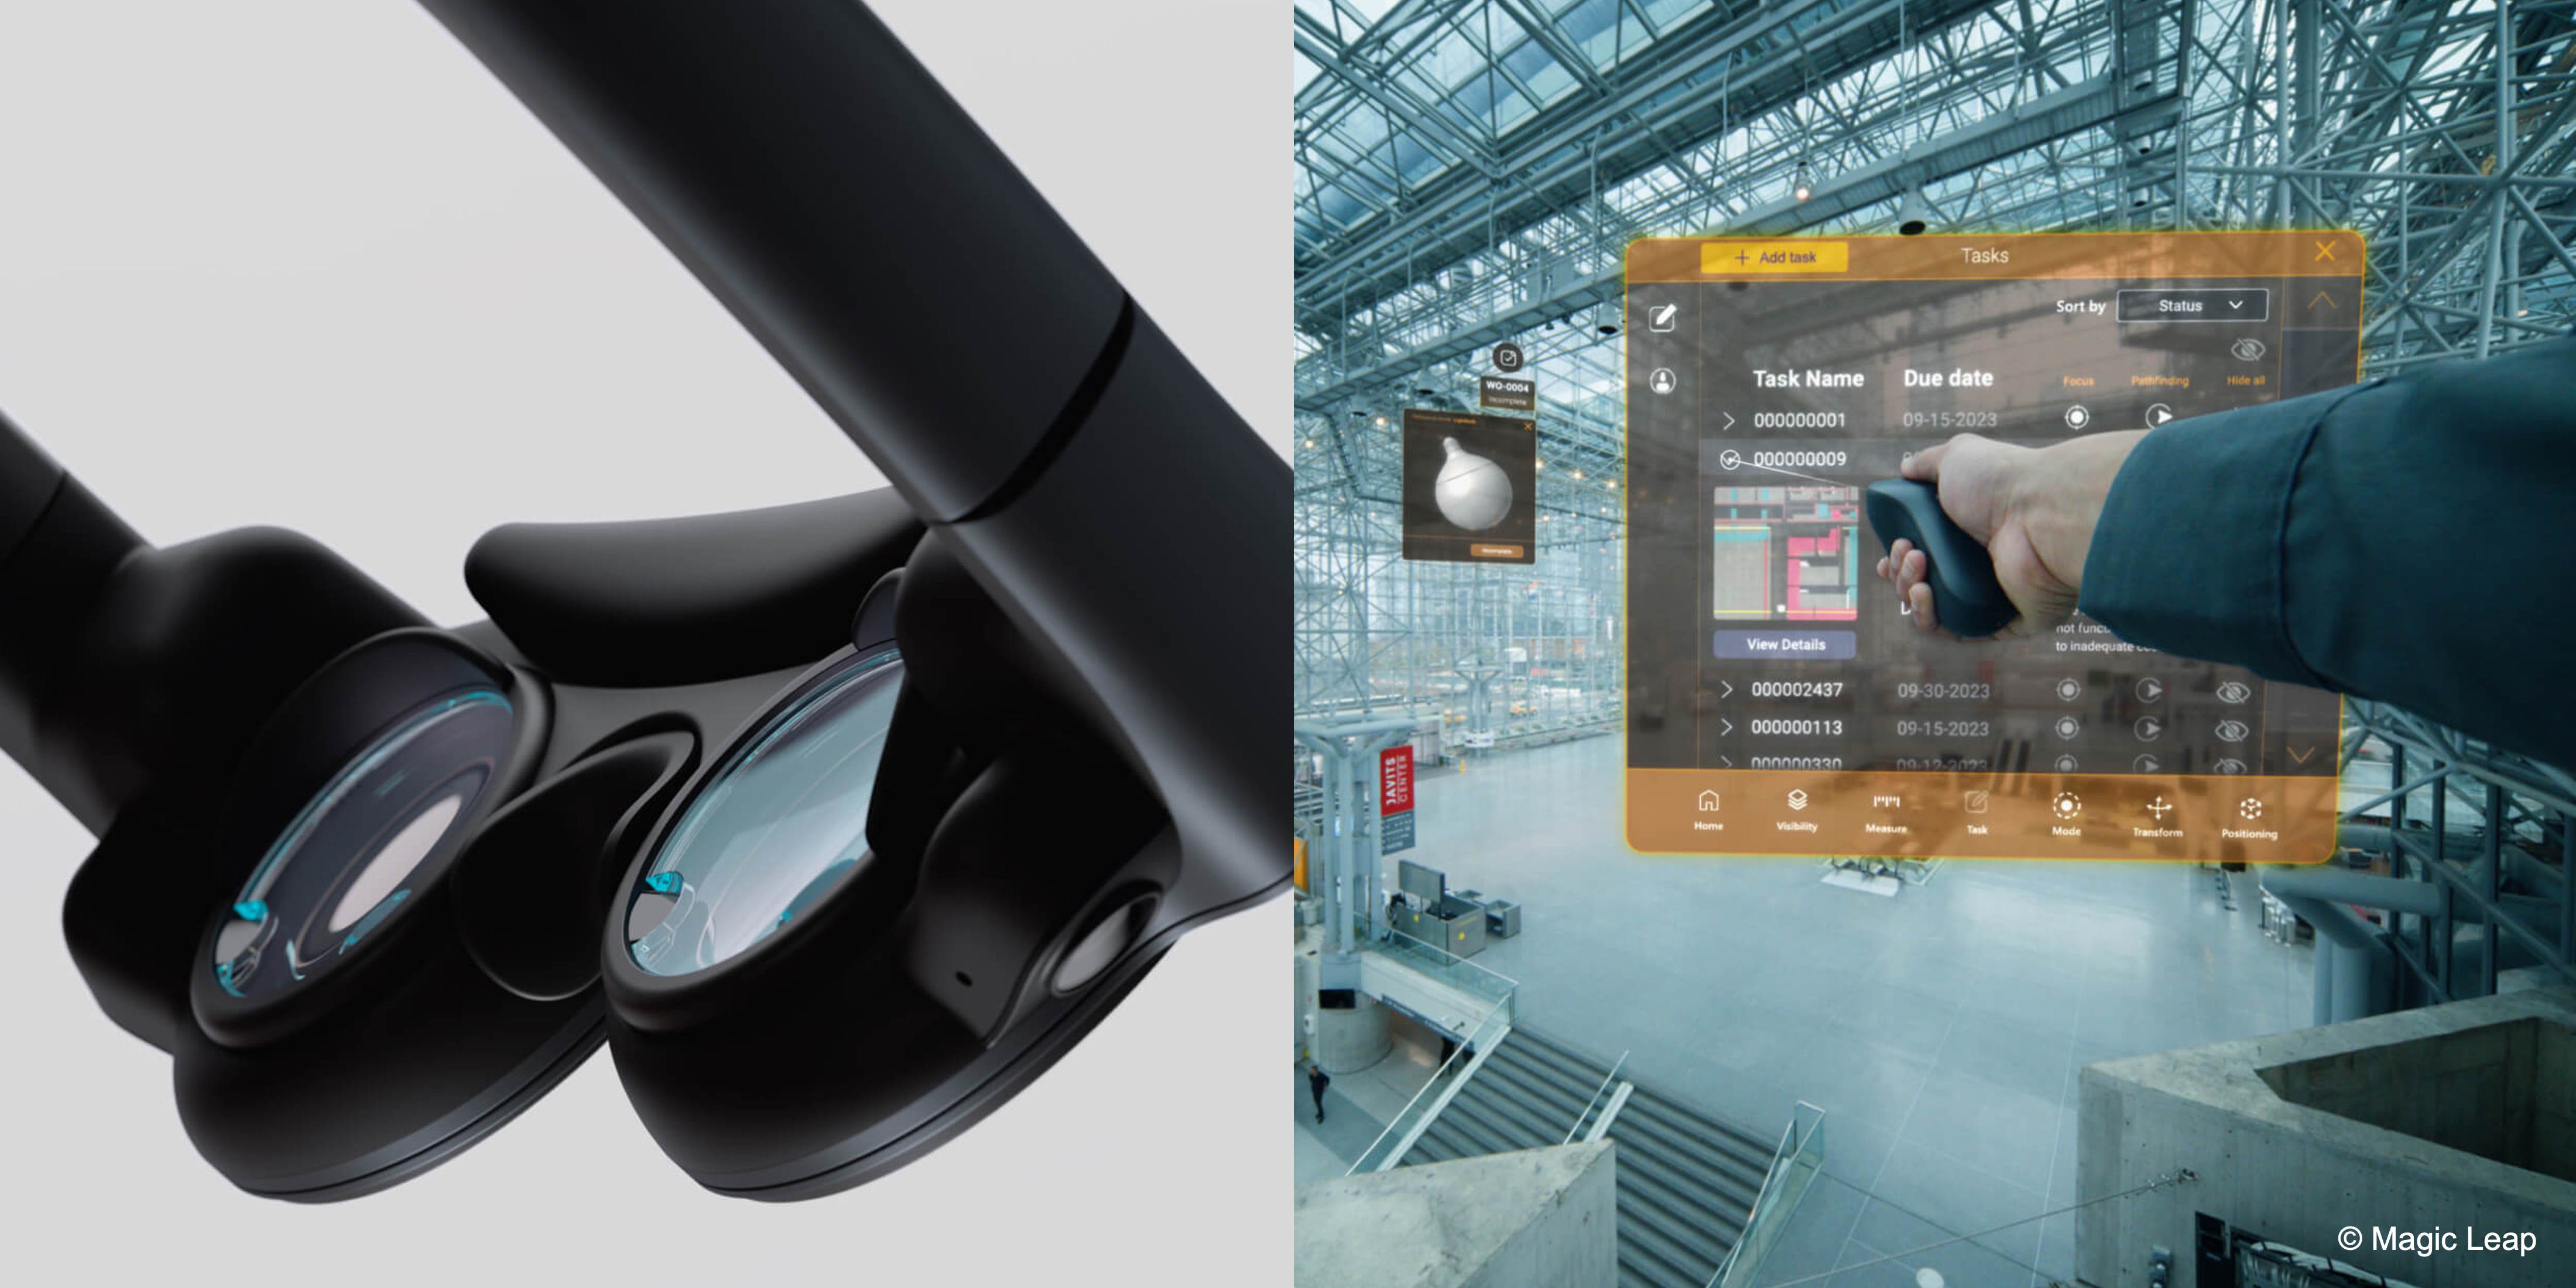
Meta Quest headsets use video passthrough AR for headset-based AR in this course—the physical world is captured by headset cameras and displayed with virtual content composited on top. For Unity and AR Foundation, use OpenXR plus the Unity OpenXR: Meta provider and feature group.
- Passthrough workflow: Enable OpenXR and Unity OpenXR: Meta in XR Plug-in Management for Android (Quest). Configure passthrough camera/background rendering and AR Foundation managers on an
XR Originscene rig. - Relevant features: Depending on package and device support, Quest passthrough AR may include plane detection, raycasts, anchors, meshing, occlusion, controller input, and hand tracking through AR Foundation and OpenXR.
- XRI reuse: The same XR Interaction Toolkit patterns from Module D—
Near-Far Interactor,XR Ray Interactor,XR Poke Interactor,XR Grab Interactable, andXR UI Input Module—apply to Quest passthrough AR with passthrough backgrounds and AR-anchored objects. - Validation: Use Quest Link / Meta Horizon Link for rapid preview where supported, but run Android Build and Run on Quest for final standalone passthrough, input, performance, comfort, and thermal validation.
Quest passthrough AR is not optical see-through AR; the user sees the physical world through headset cameras. This supports strong integration with VR/XRI workflows but requires careful safety and latency awareness.
Mixed Reality Toolkit (MRTK)
MRTK is Microsoft’s open-source framework for developing mixed reality applications, primarily on HoloLens 2. It provides building blocks for spatial interaction, cross-platform support, and UI components optimized for hands-free, gaze-first workflows. MRTK is not the main framework for Module E in this course—hands-on work uses AR Foundation, XRI, and Quest passthrough AR. Use MRTK as comparison/context for HoloLens UI and interaction patterns. Core features include:
- Hand and Eye Tracking: Fully supports HoloLens 2’s articulated hand input and eye gaze, enabling natural manipulation, selection, and attention tracking.
- Spatial Mapping and Understanding: Generates 3D meshes of the physical environment and identifies semantic surfaces for better spatial interaction and navigation.
- World Anchors and Sharing: Enables persistent AR content and multi-user synchronization by anchoring objects in shared physical space.
- UX Building Blocks: Offers prebuilt components like hand-friendly buttons, sliders, radial menus, and dialogs optimized for head-mounted AR use with minimal coding.
XR Plugin Management
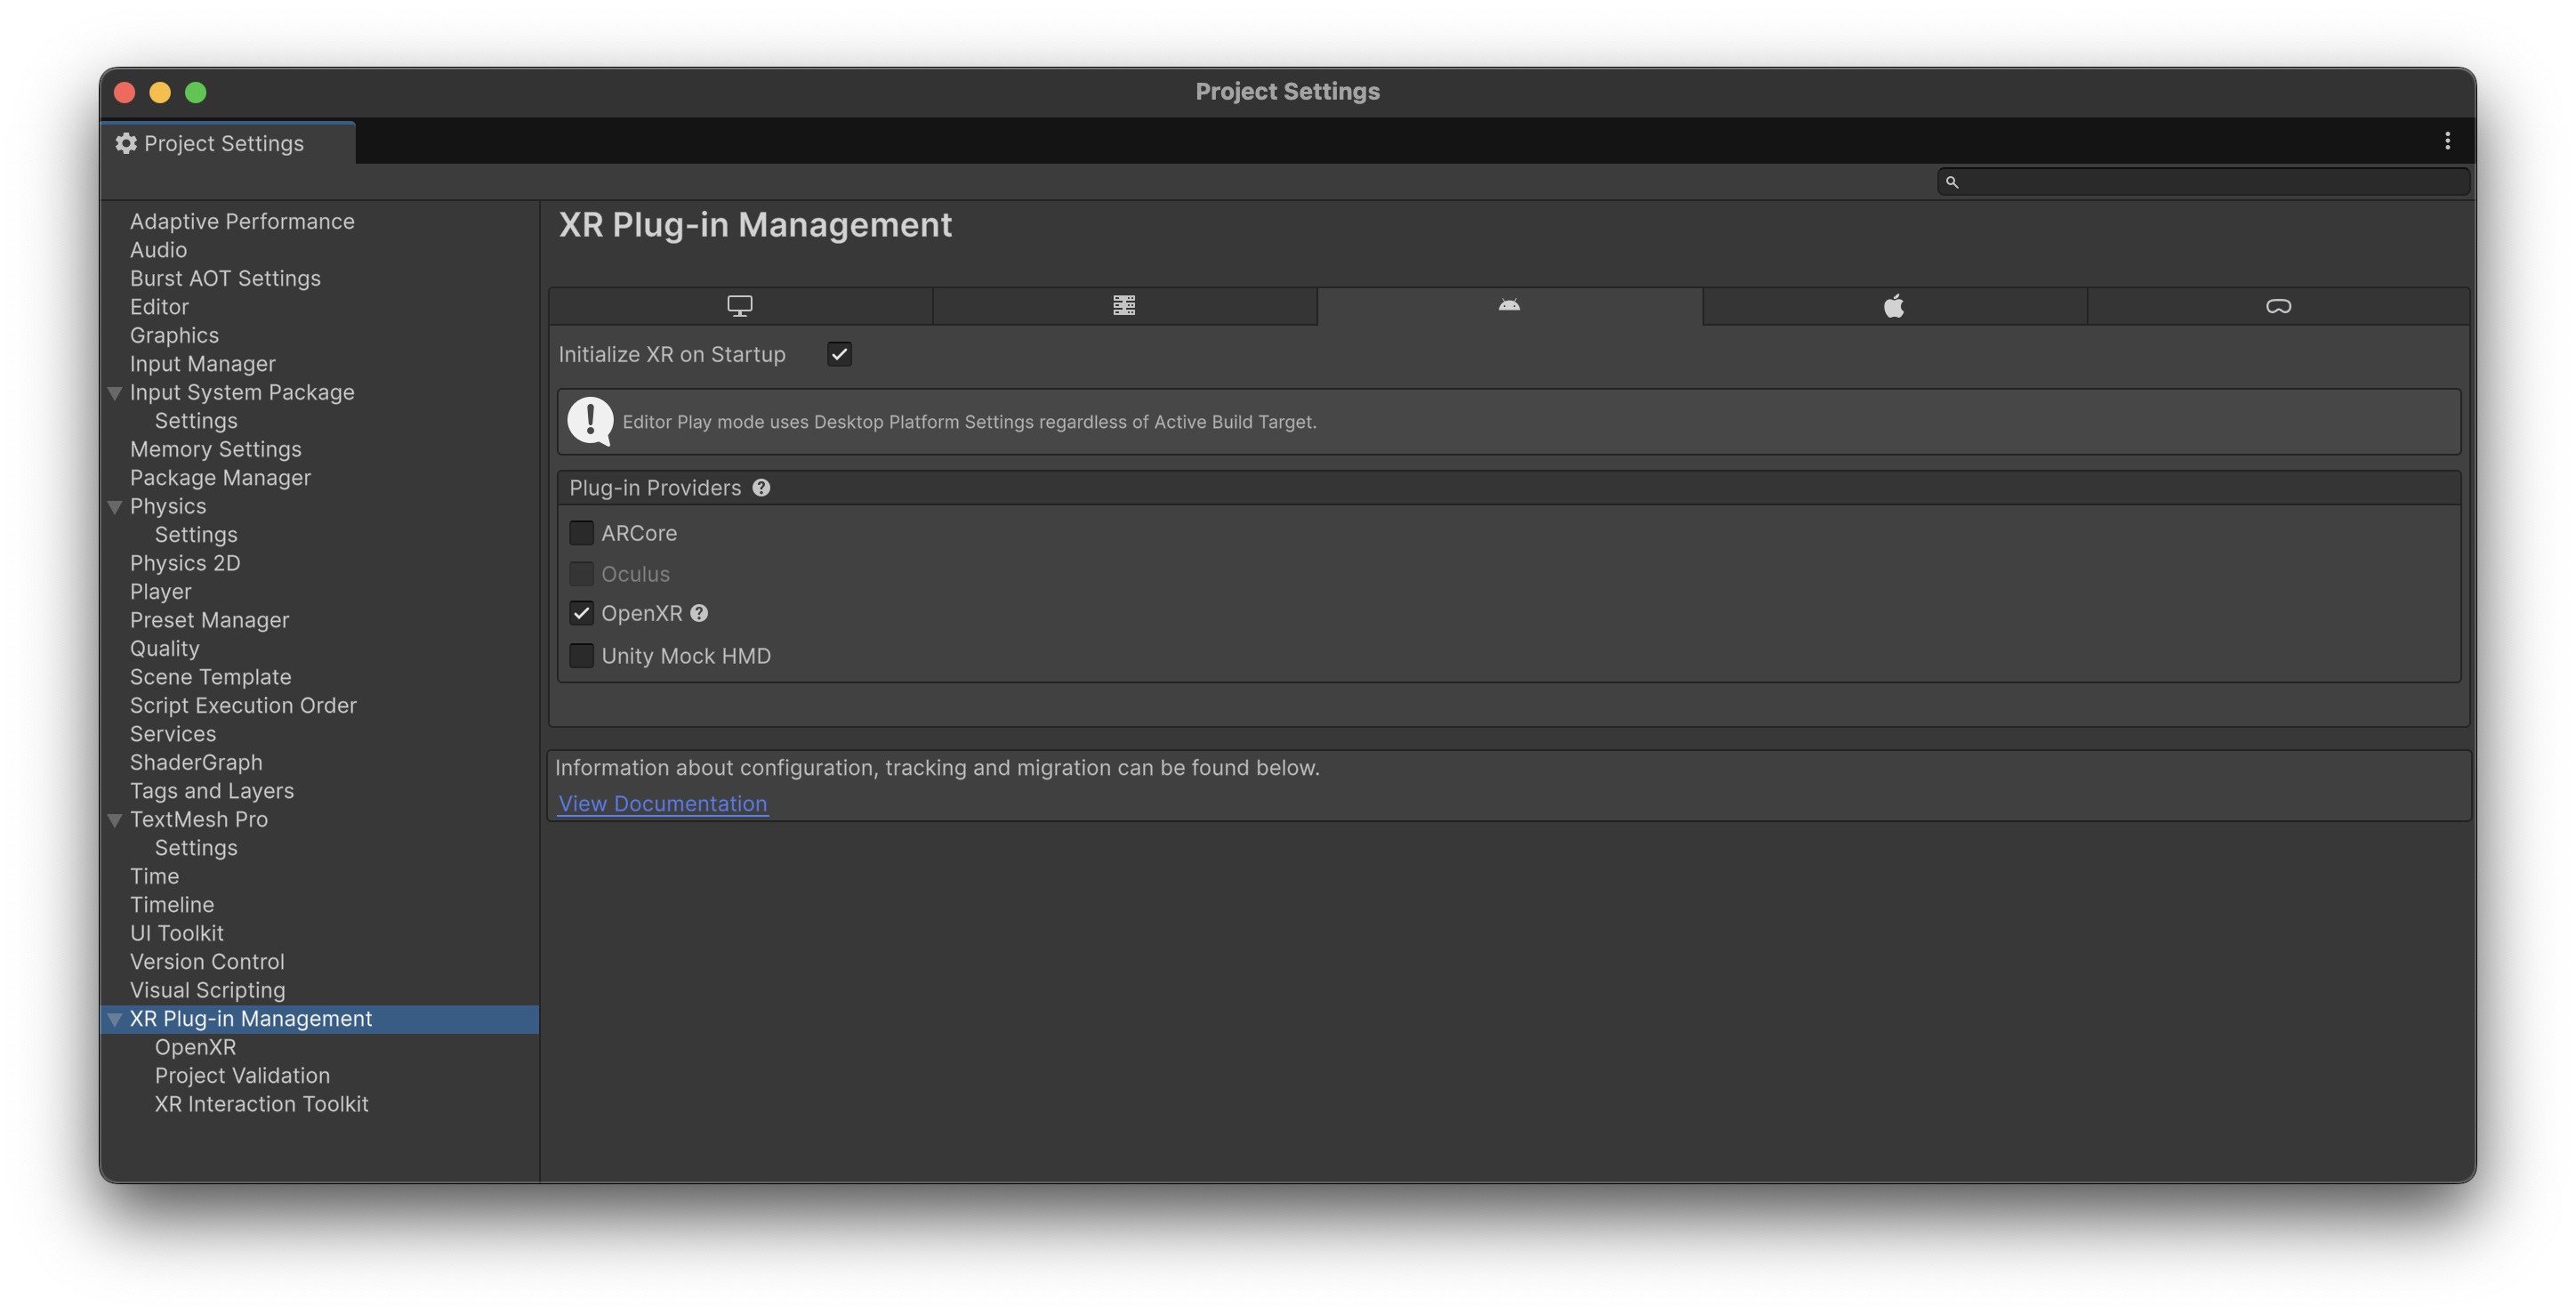
XR Plug-in Management is Unity’s system for managing and loading XR plug-ins. AR Foundation depends on XR Plug-in Management and provider plug-ins being enabled for the target platform. It abstracts platform-specific details, allowing developers to switch between AR and VR runtimes without rewriting core project logic. Examples for this course:
- Android mobile AR: Google ARCore XR Plug-in
- iOS/iPadOS mobile AR: Apple ARKit XR Plug-in
- Meta Quest passthrough AR: OpenXR + Unity OpenXR: Meta feature group
- Other targets: visionOS, HoloLens/OpenXR, or additional providers as needed for comparison builds
In Unity, plugins are external libraries—either managed (C# DLLs) or native (C++, Java, Objective-C)—that extend the engine’s functionality, often enabling platform-specific features or third-party integrations. They are commonly used for tasks like accessing native device APIs, integrating SDKs, or enhancing editor tools. Different build targets may require different provider settings, package features, and permissions.
XR Interaction Toolkit
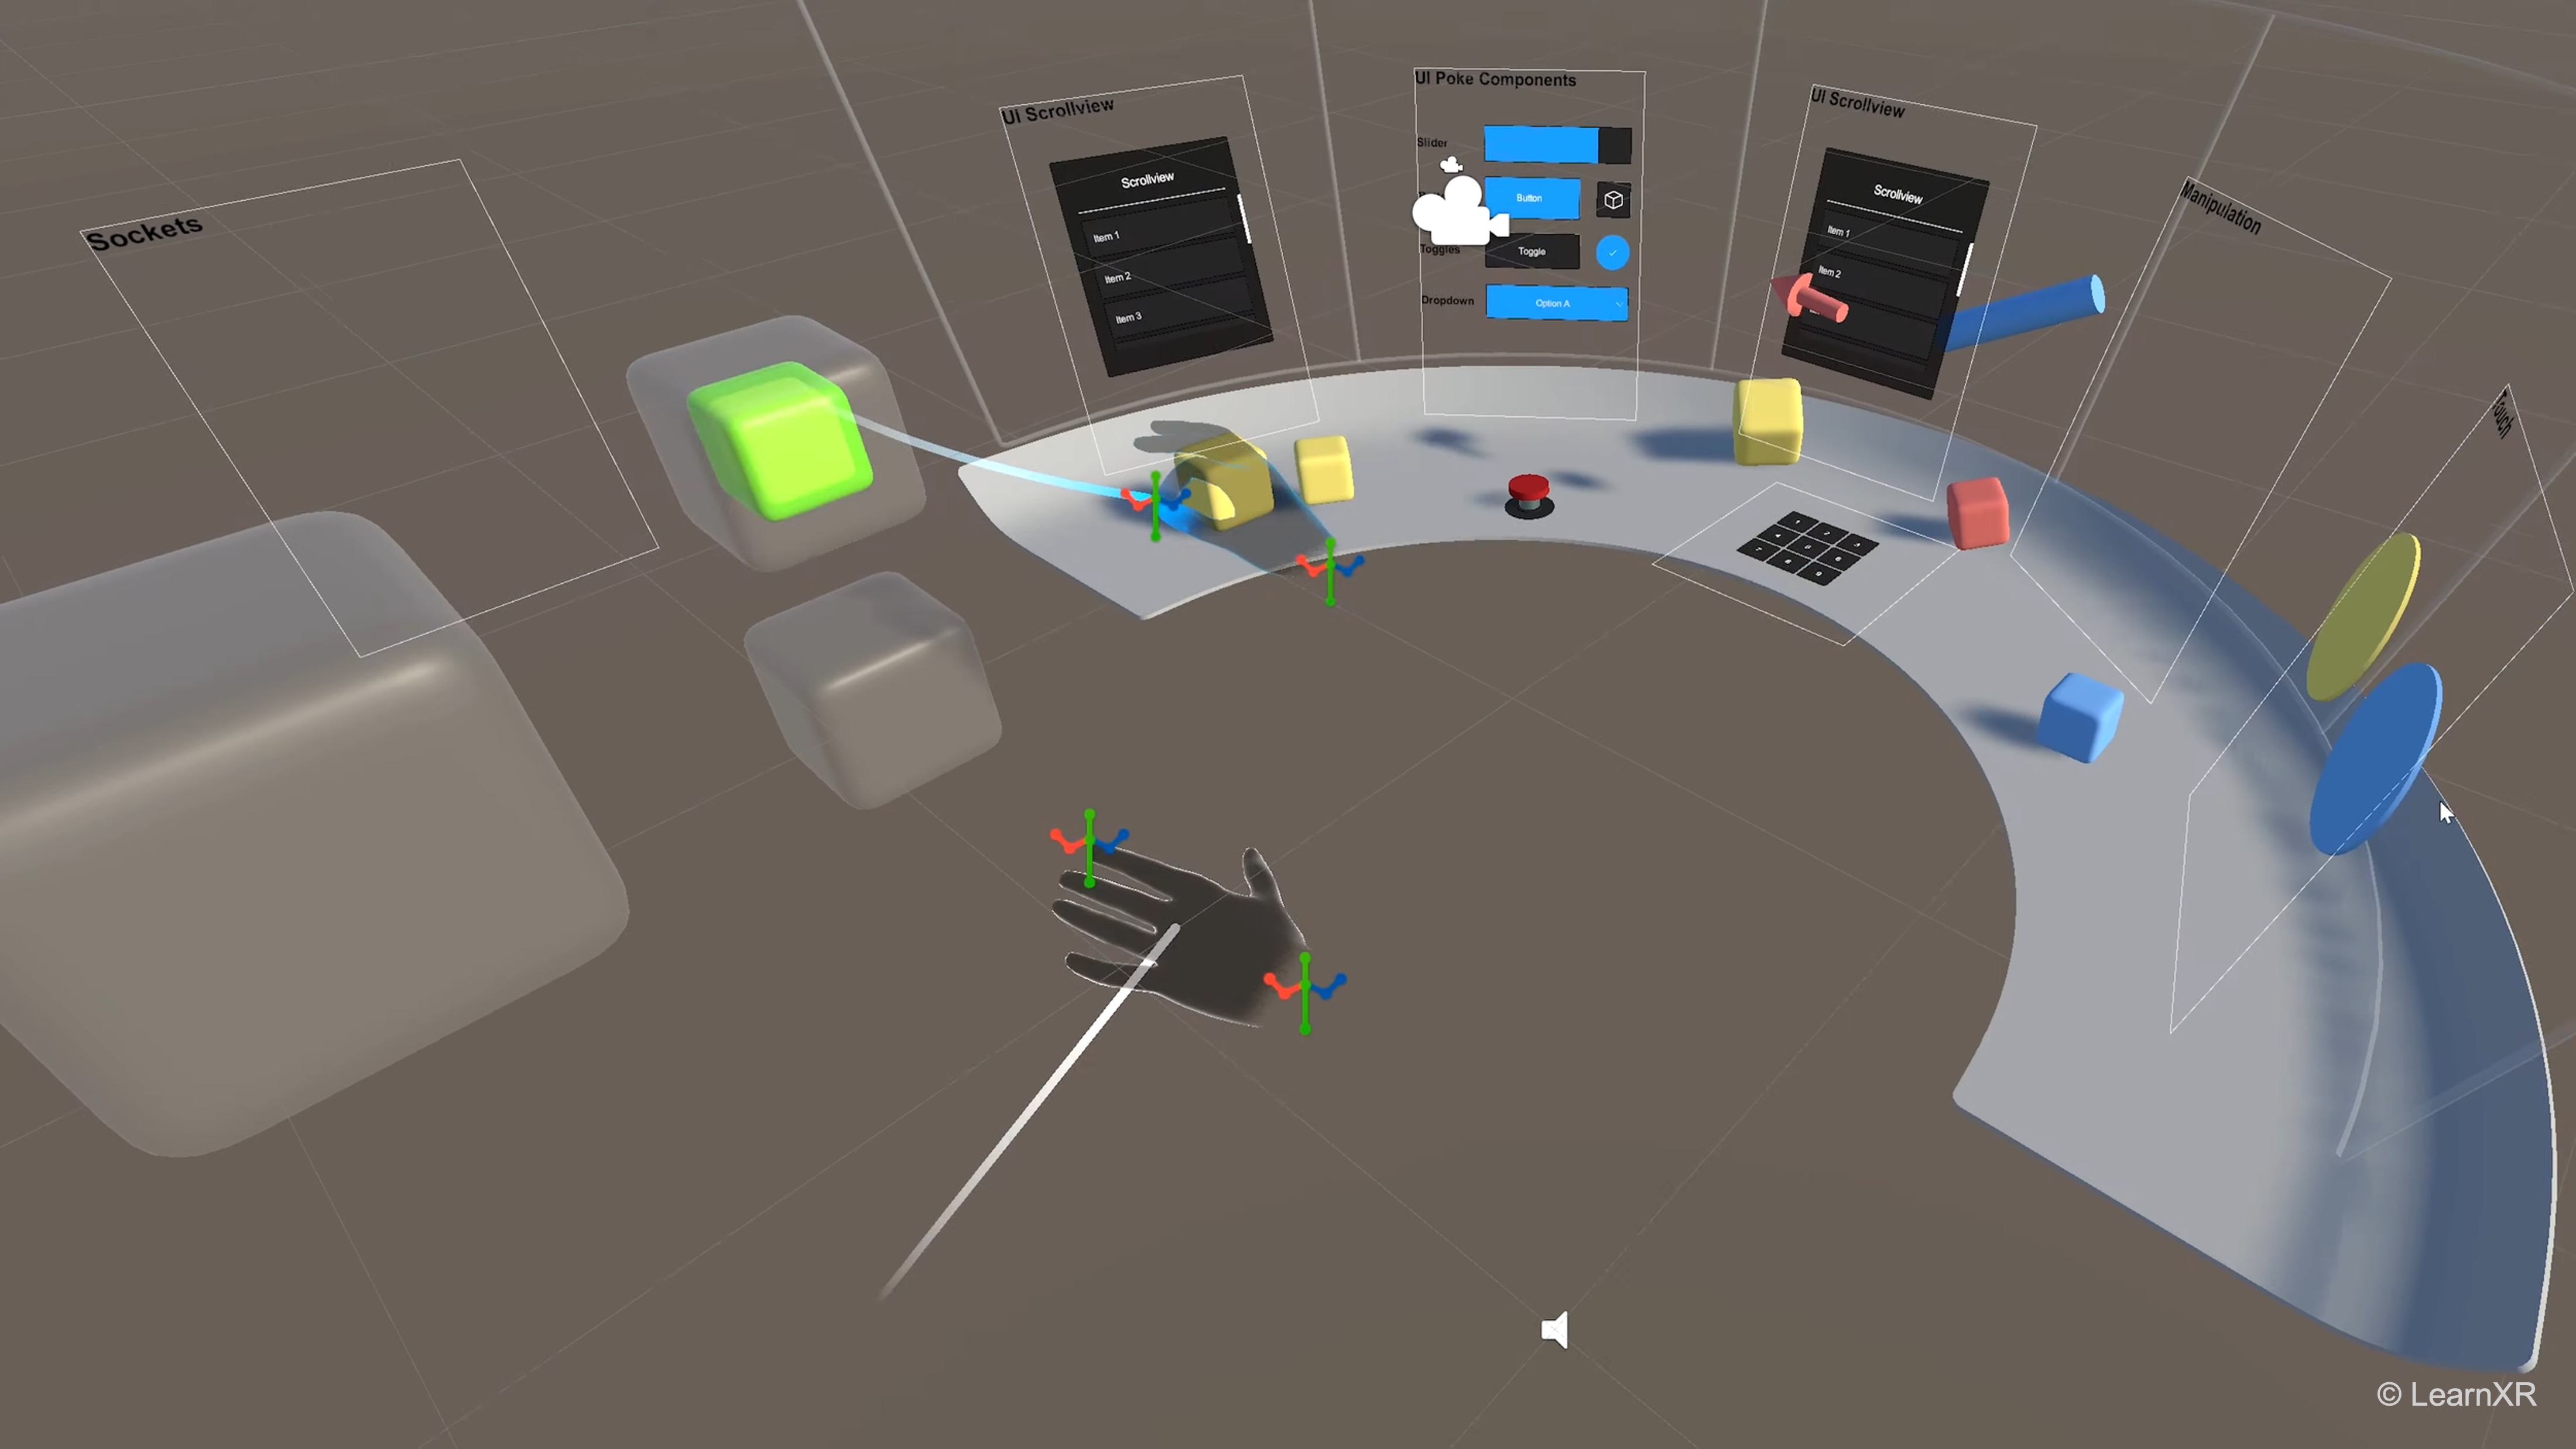
The XR Interaction Toolkit (XRI) is Unity’s framework for creating and managing user interactions in XR environments—not only VR. It offers components and tools that enable developers to set up common interaction patterns such as grabbing, ray selection, poke interaction, and world-space UI manipulation. For Quest passthrough AR, the same XRI patterns from Module D apply with passthrough backgrounds and AR-anchored content. Core concepts include:
- Interaction Components:
XR Origin,Near-Far Interactor,XR Ray Interactor,XR Poke Interactor,XR Grab Interactable, andXR UI Input Modulefor world-space UI. - Event-Driven Architecture: Utilizes Unity events to trigger interactions, making it easier to extend and customize behavior.
- Modularity: Designed to be modular so that developers can mix and match components based on the needs of their application.
Input System Package
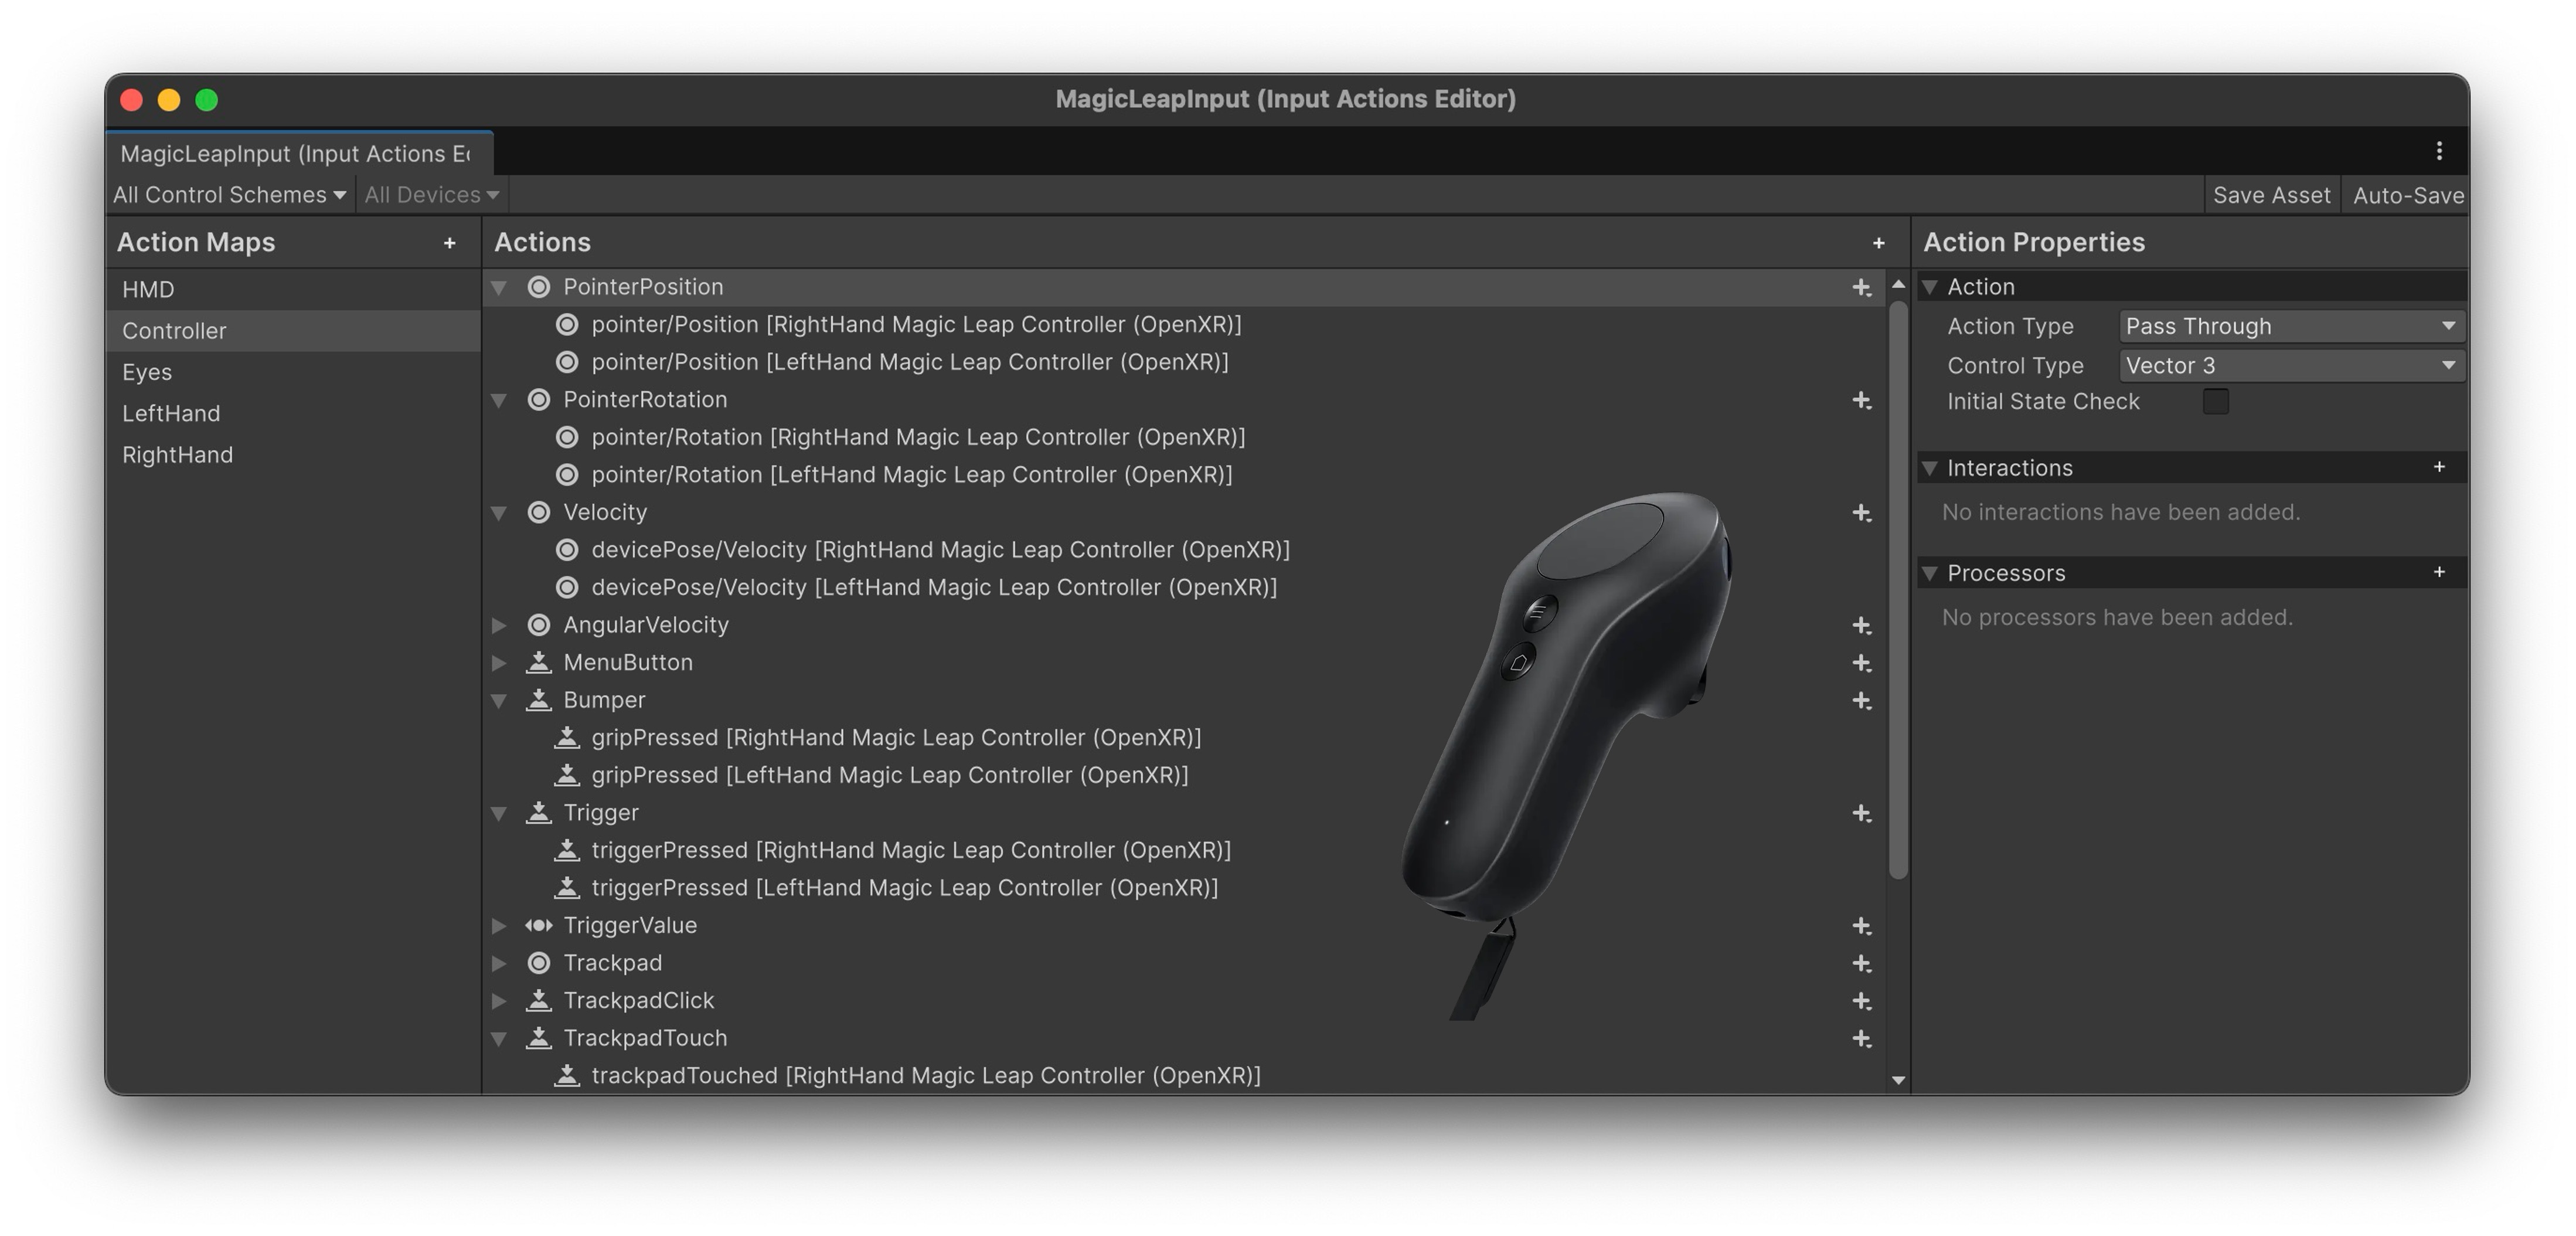
The Input System package in Unity is a modern framework for handling user input across a wide variety of devices. It replaces the older input system with a flexible, action-based architecture, making it especially valuable in XR development where diverse input methods—such as touch, controllers, hand tracking, gaze, and voice—are common. In this course, it supports mobile AR touch input and Quest passthrough interaction through XRI and OpenXR. Core features include:
- Action-Based Input: Uses input actions and bindings, allowing developers to map various input types (e.g., touch, trigger, pinch) to logical in-app behaviors.
- Extensibility: Supports custom devices and gesture inputs through a modular architecture, enabling integration with platform-specific interaction models.
- Event-Driven Model: Responds to user input through event callbacks, providing more responsive and decoupled input logic.
Voice commands, hand pinch gestures to grab machine components, and thumbstick input can be managed using action maps defined in Unity’s Input System. This modular setup allows input profiles to be toggled or remapped per station or task with minimal effort.
XR Simulation
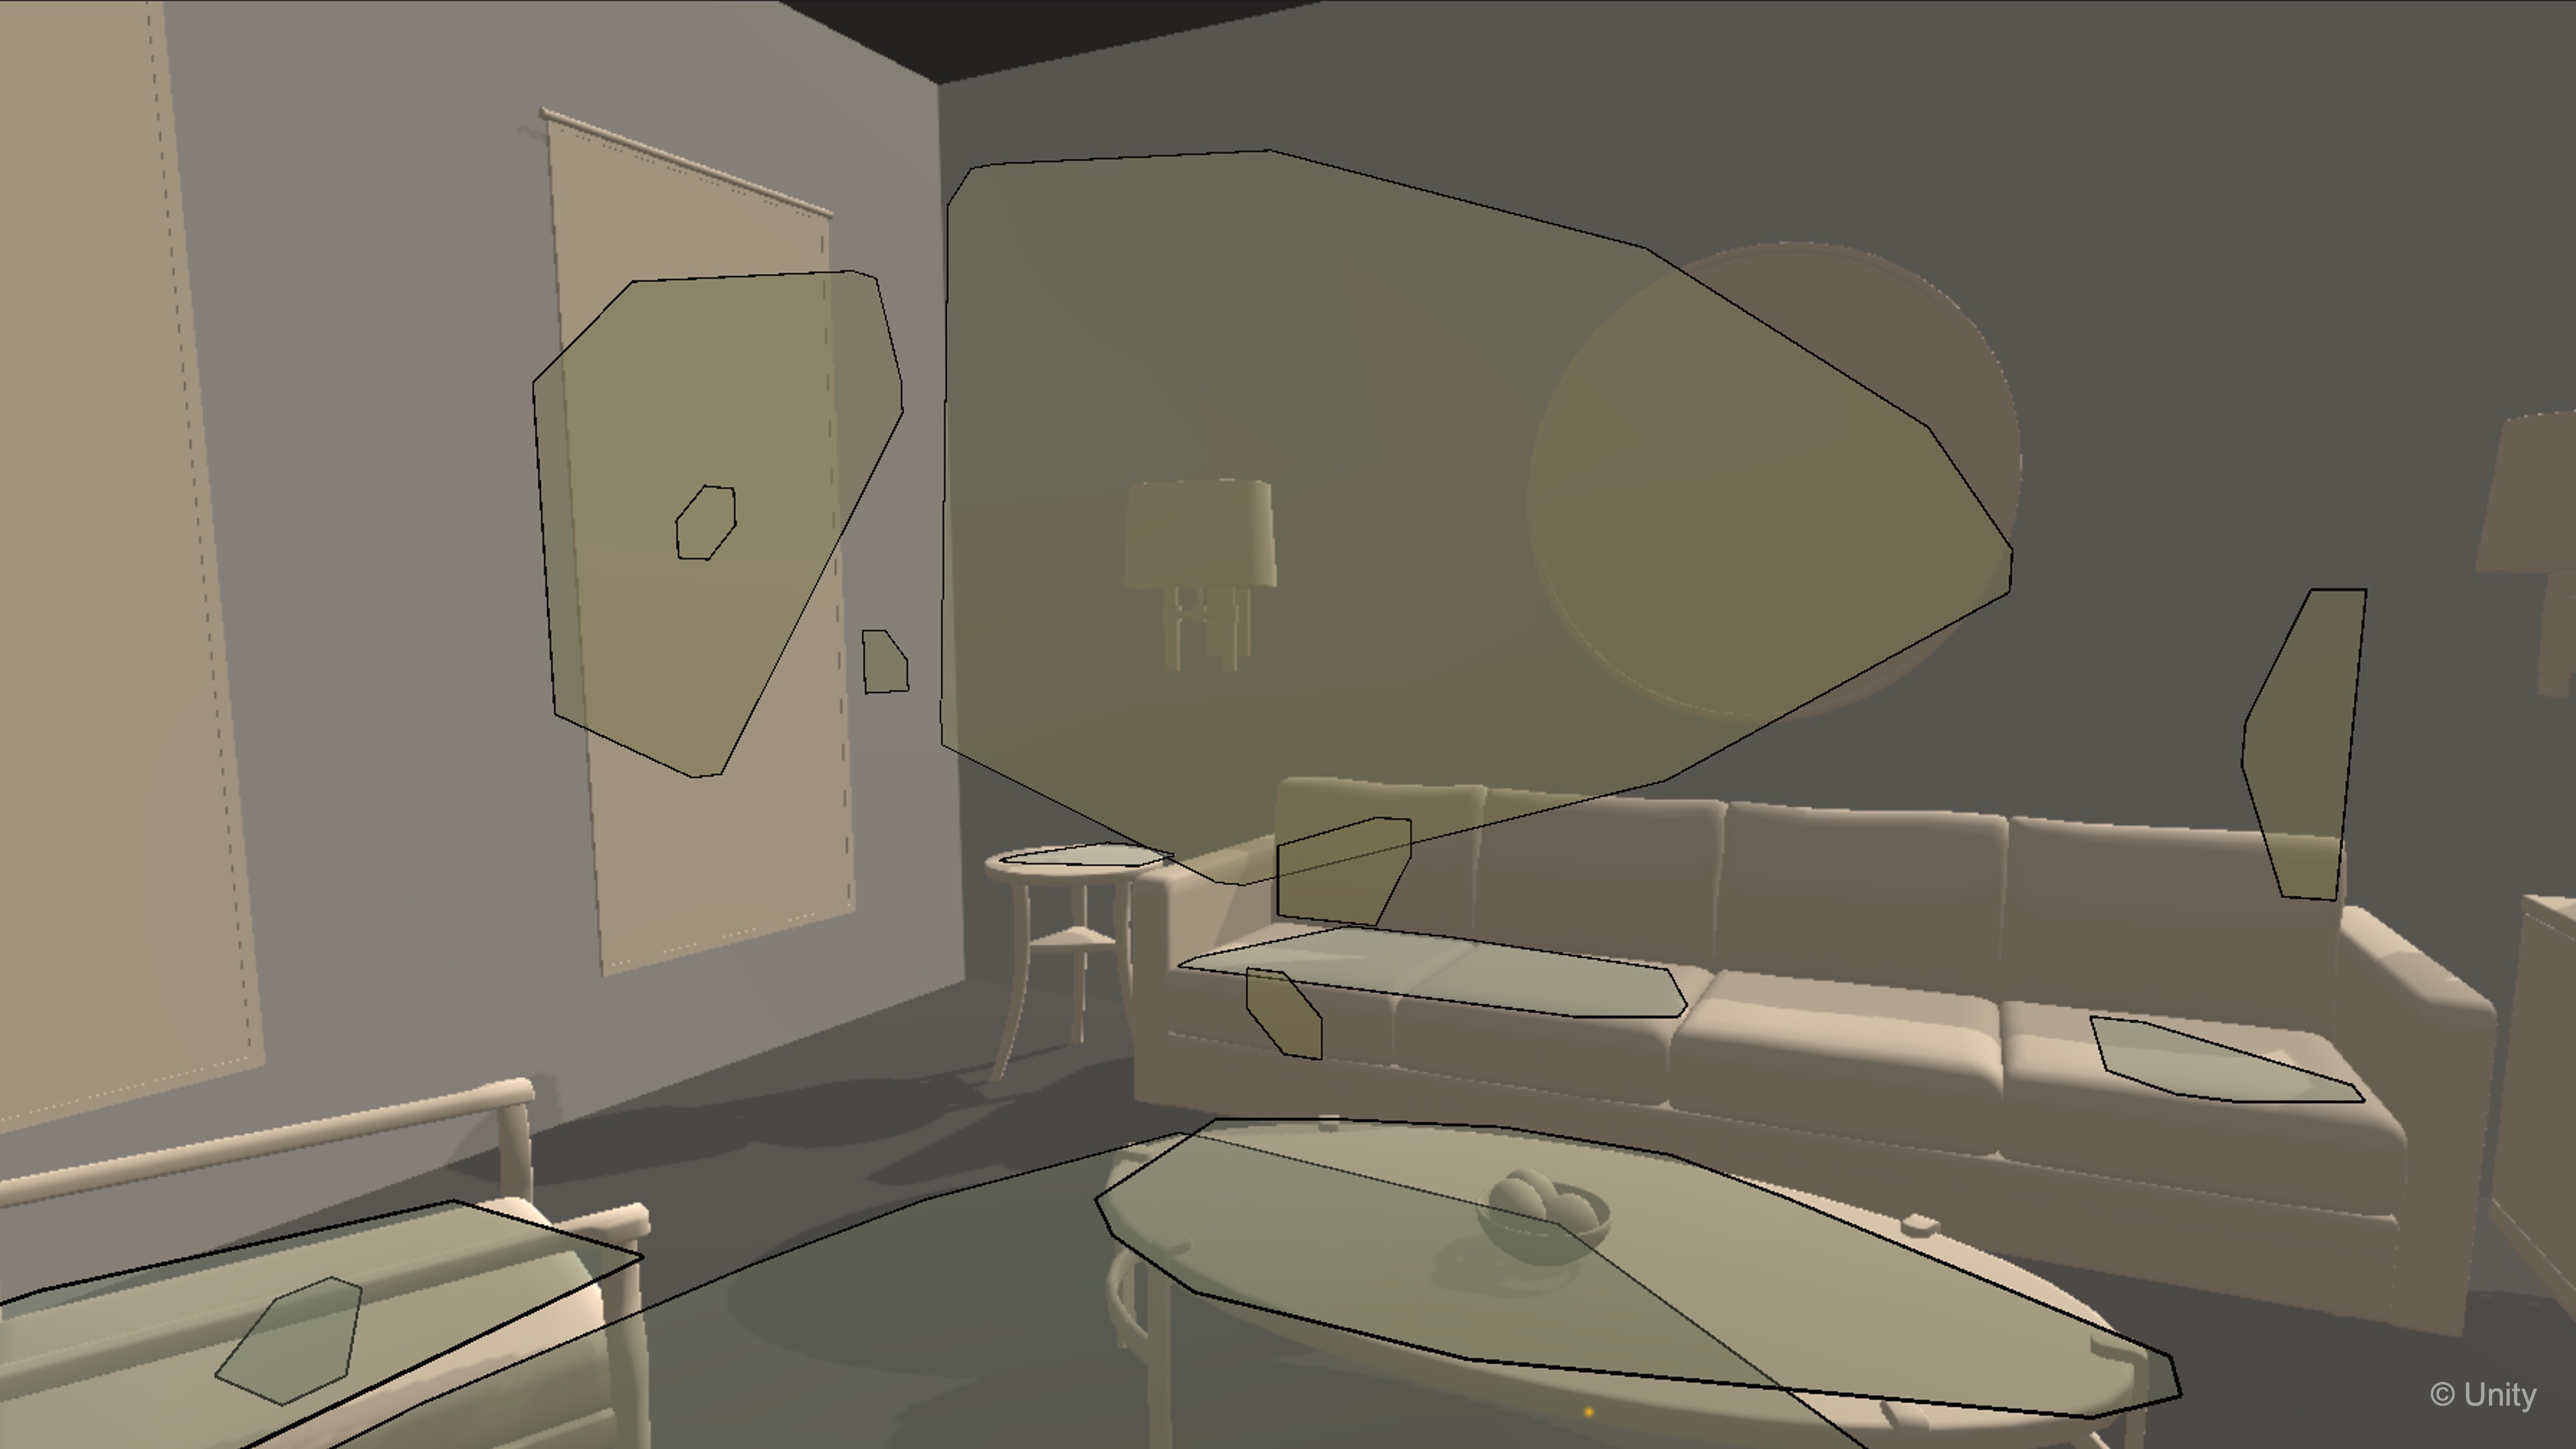
XR Simulation enables in-Editor testing of AR applications by simulating XR device behavior in virtual environments. It allows developers to move through preconfigured or custom scenes—like living rooms or office spaces—and simulate real-world AR features without deploying to physical devices when XR Simulation is enabled. AR scenes still require AR Session and XR Origin. It is useful for testing AR features like plane detection, point clouds, or anchors in contextual environments without needing a phone or headset. Core features include:
- Environment-Based Simulation: Loads realistic 3D environments where AR Foundation simulates device movement and tracking.
- Simulated AR Subsystems: Supports key AR features like plane detection, image tracking, anchors, and occlusion within Play Mode on supported simulation providers.
- Keyboard & Mouse Navigation: Developers can navigate XR Simulation environments using familiar desktop inputs to simulate movement and interaction.
| AR Feature (XR Simulation) | Description | Typical Editor Support |
|---|---|---|
| Session | Starts and manages the AR session runtime in Play Mode | ✅ |
| Device Tracking | Tracks device position and orientation in space for camera alignment | ✅ |
| Camera | Simulated live AR camera feed for Editor preview | ✅ |
| Plane Detection | Finds horizontal and vertical flat surfaces for placement | ✅ |
| Bounding Box Detection | Detects estimated 3D object bounding regions enabling object-aware placement | ⚠️ varies |
| Image Tracking | Tracks known reference images and markers from image libraries | ⚠️ varies |
| Object Tracking | Tracks predefined 3D reference objects using scanned models | ❌ not typical |
| Face Tracking | Tracks face position and facial features for face-anchored content | ❌ not typical |
| Body Tracking | Tracks full-body skeletal pose for body-relative overlays | ❌ not typical |
| Point Clouds | Sparse 3D environment feature points for spatial mapping | ✅ |
| Ray Casts | Casts rays against tracked scene geometry for hit testing | ✅ |
| Anchors | Pins virtual content to world pose for stable alignment | ✅ |
| Meshing | Reconstructs detailed environment surface mesh for occlusion | ⚠️ varies |
| Environment Probes | Captures scene lighting and reflection data for material lighting | ⚠️ varies |
| Occlusion | Hides virtual content behind real geometry for depth compositing | ⚠️ varies |
| Participants | Multi-user shared AR session roles for collaborative sessions | ❌ not typical |
XR Simulation is not a substitute for physical-device testing. Camera exposure, passthrough quality, tracking drift, thermal behavior, real lighting, reflective surfaces, and ergonomics must be tested on phone/tablet or Quest hardware. AR Foundation uses Editor simulation providers in Play Mode; device builds use the platform provider (ARKit, ARCore, Unity OpenXR: Meta, etc.) configured in XR Plug-in Management.
AR Hardware
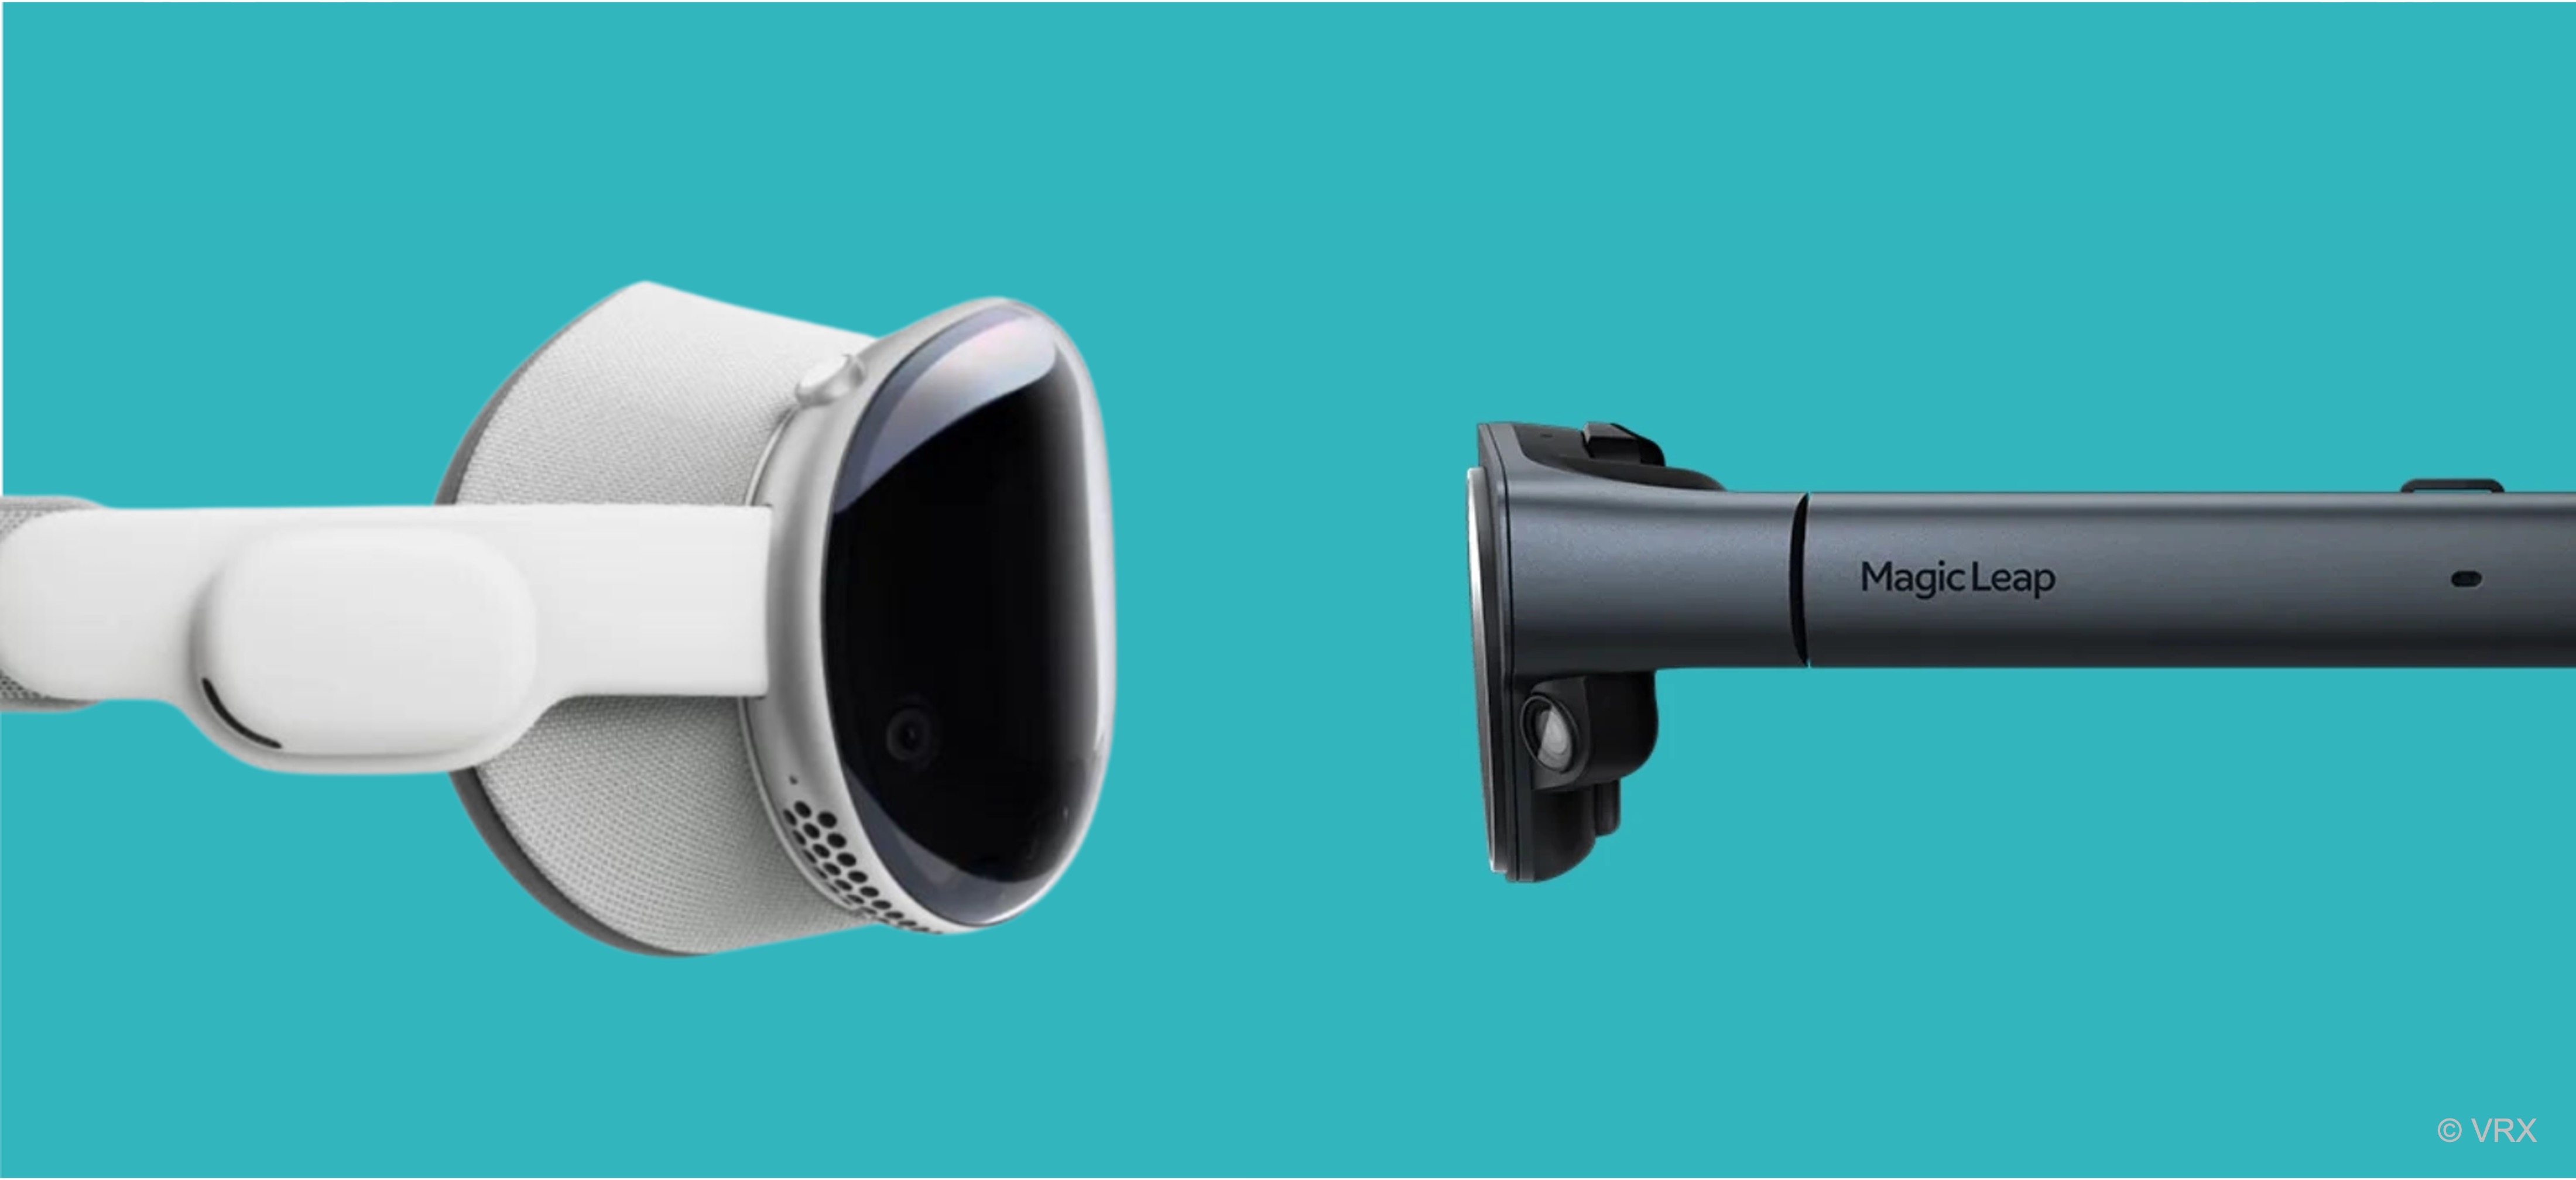
AR hardware spans a broad spectrum from conventional mobile devices to specialized head-mounted displays (HMDs) and smart glasses. Each type comes with its own strengths and is chosen based on application needs within engineering and other fields. AR devices must provide clear views of the physical world while overlaying digital content seamlessly—without obstructing hazards or operator awareness. Whether used for a short demonstration or extended work sessions, AR hardware should be lightweight and comfortable. Prolonged use requires careful design to minimize fatigue and maximize user engagement. For this course, organize hardware around three categories:
Mobile AR uses phones and tablets (ARKit/ARCore). Optical see-through AR is common in devices like Magic Leap 2 or HoloLens 2 using transparent lenses to overlay digital content directly onto the user’s view of the real world. Passthrough AR is used in devices like Meta Quest 3 (course primary), Apple Vision Pro, and Varjo XR, which captures the physical world via headset cameras and re-displays it with virtual overlays.
Sensors and Cameras
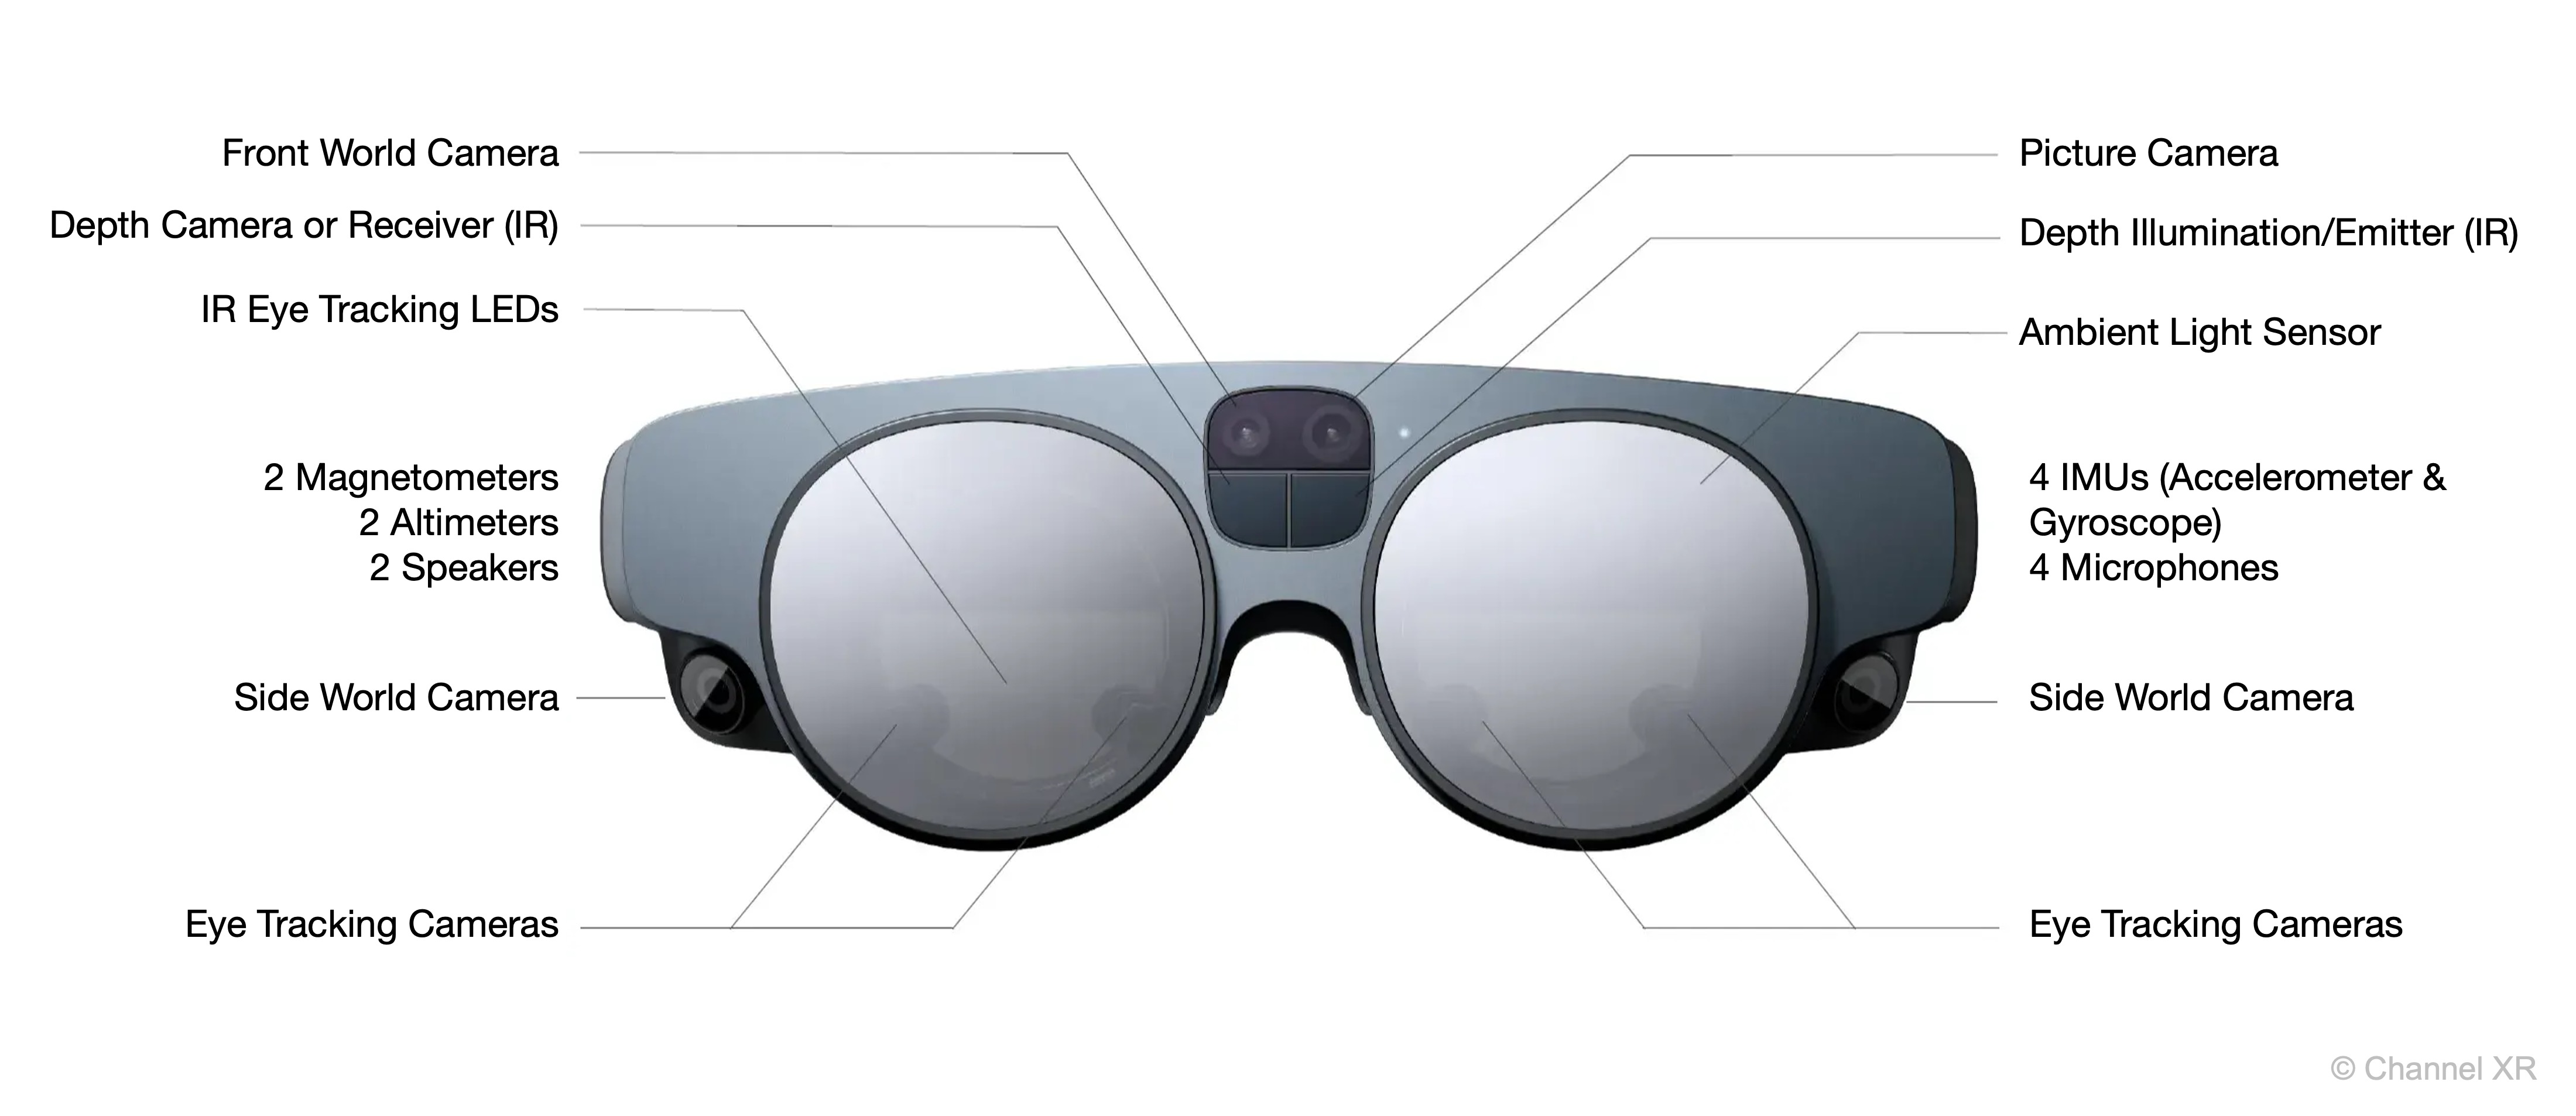
At the heart of every AR device are the sensors and cameras that enable environmental awareness and user interaction:
- Environmental Mapping: Sensors capture spatial details to align digital overlays precisely with real-world objects. This process involves real-time data acquisition from cameras, depth sensors, and sometimes LiDAR to create an accurate model of the physical space.
- Gesture and Motion Tracking: These sensors enable intuitive interactions by detecting user movements and gestures, which is crucial for applications that require hands-free control or natural interactions with virtual elements.
- Gaze Tracking: Specialized sensors monitor the user’s eye movements to determine focus and intent, allowing for more responsive interfaces and contextual interactions based on what the user is looking at.
- Audio Input: Built-in microphones capture voice commands and ambient sounds, enabling voice-activated controls and enhancing the immersive experience by integrating auditory context.
- Inertial Measurement Units (IMUs): Provide orientation and movement data that enhance motion tracking and overall responsiveness.
- Ambient Light Sensors: Adjust display brightness based on the surrounding light conditions, ensuring optimal visibility of digital content.
- Magnetometers: Help determine the device’s orientation relative to the Earth’s magnetic field, improving positional accuracy.
Types & Features
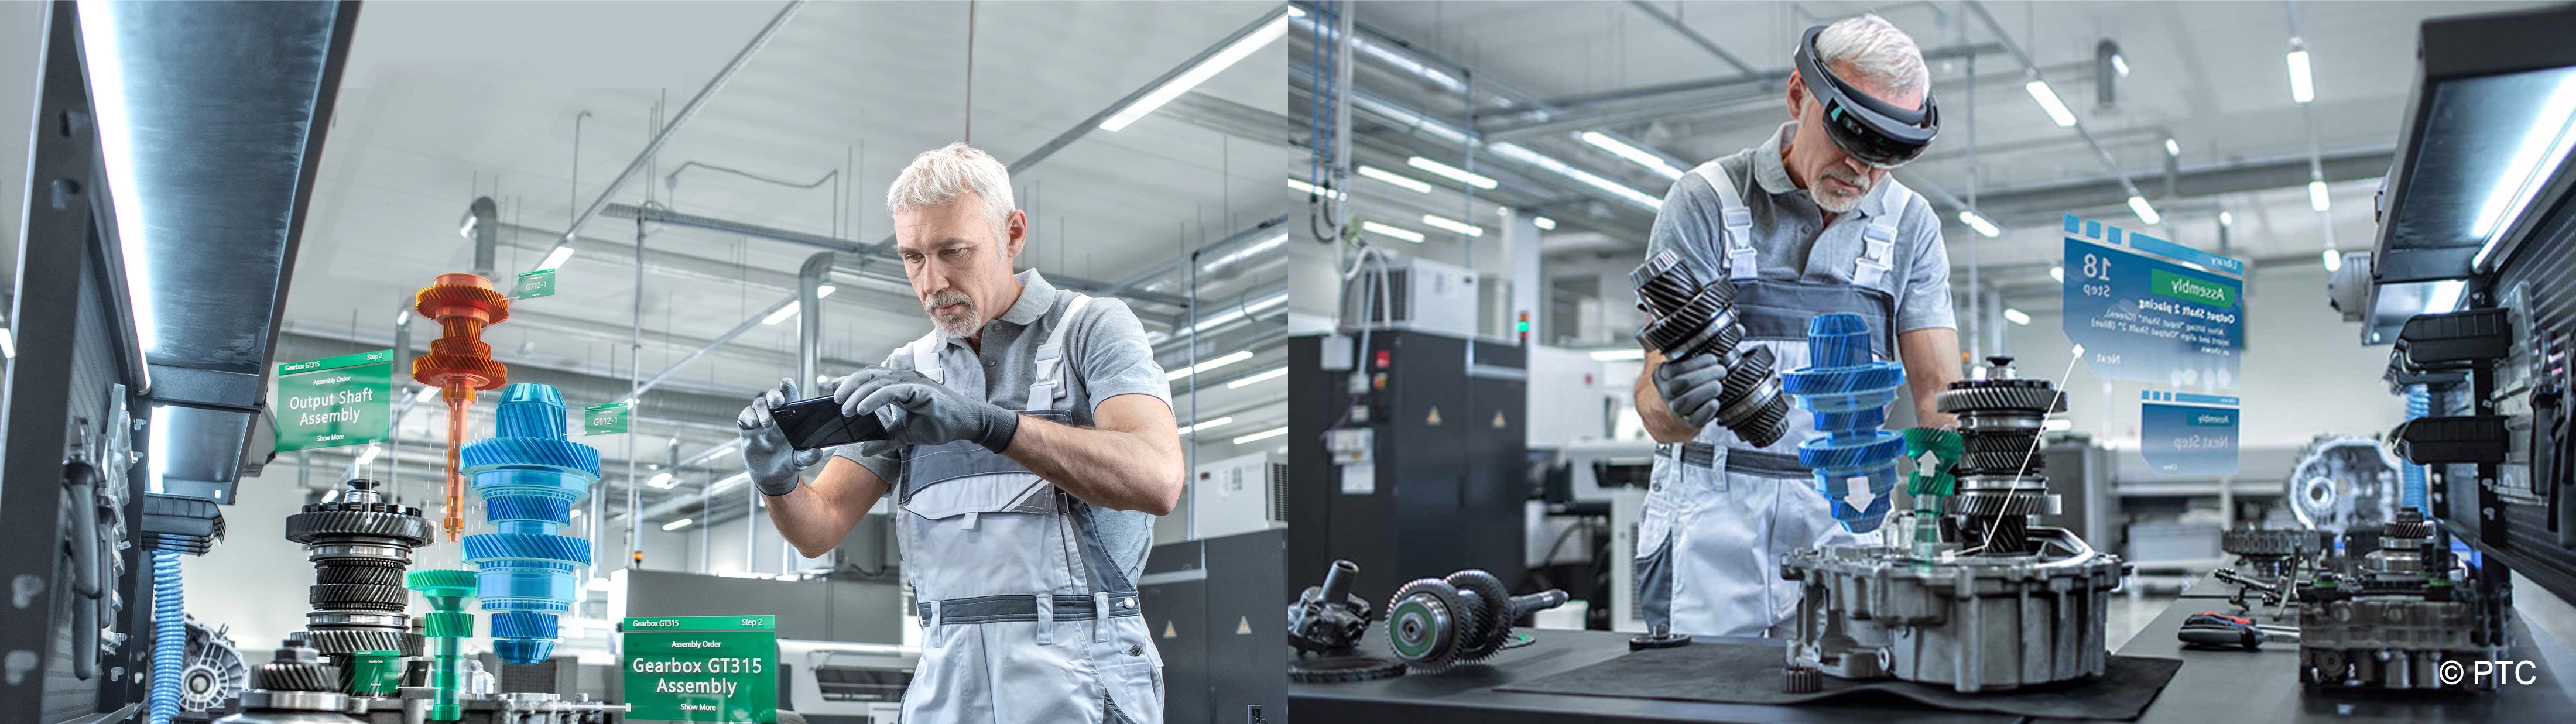
AR solutions in this course fall into three categories: handheld mobile AR, optical see-through AR, and passthrough AR headsets. Each serves different user needs and deployment contexts, from consumer applications to industrial workflows.
- Mobile (Handheld) AR uses smartphones or tablets to superimpose digital content on live camera feeds. It’s widely used in applications like on-site equipment inspections, product visualization, remote assistance, and retail try-ons. The key benefits are low cost, broad accessibility, and ease of deployment—ideal for scenarios where quick interaction, portability, rapid deployment, and broad compatibility are essential.
- Optical see-through AR uses transparent optics in devices like HoloLens 2 and Magic Leap 2, overlaying digital content into the user’s direct field of view. It enables hands-free workflows with direct environmental awareness. In this course, optical headsets are comparison/context devices, not the primary hands-on tutorial target.
- Passthrough AR uses headset cameras to display the physical world with composited digital content. Meta Quest is the primary wearable/headset development platform for Module E, reusing OpenXR, AR Foundation, and XRI patterns from earlier modules.
| Feature | Handheld AR | Optical See-Through AR | Passthrough AR |
|---|---|---|---|
| Device examples | iPhone, iPad, Android phones/tablets | HoloLens 2, Magic Leap 2 | Meta Quest 3 / Quest 3S (course primary), Apple Vision Pro, Varjo XR |
| Interaction methods | Touch, on-screen gestures | Hands, gaze, voice (device dependent) | Controllers, hands, ray/poke (XRI); Quest course path |
| Strengths | Low cost, wide reach, familiar UX | Direct view of world, hands-free optical overlays | Strong XRI/VR workflow reuse, standalone Quest deployment |
| Limitations | Screen-held, smaller FOV, one-hand use | Brightness/FOV limits, higher cost, niche supply | Camera latency, depth mismatch, mediated vision safety |
| Course role | Mobile AR tutorials (E2–E5) | Comparison/context only | Primary wearable/headset tutorial path (Module E) |
Choose mobile AR when speed, reach, and simplicity are key. Choose Quest passthrough AR when tasks need headset immersion with the physical workspace visible through cameras. Use optical see-through hardware as reference when comparing platform tradeoffs—not as the default tutorial stack.
AR Headsets
Headset capabilities change rapidly—verify current platform documentation before relying on a feature.
Meta Quest 3 / Quest 3S
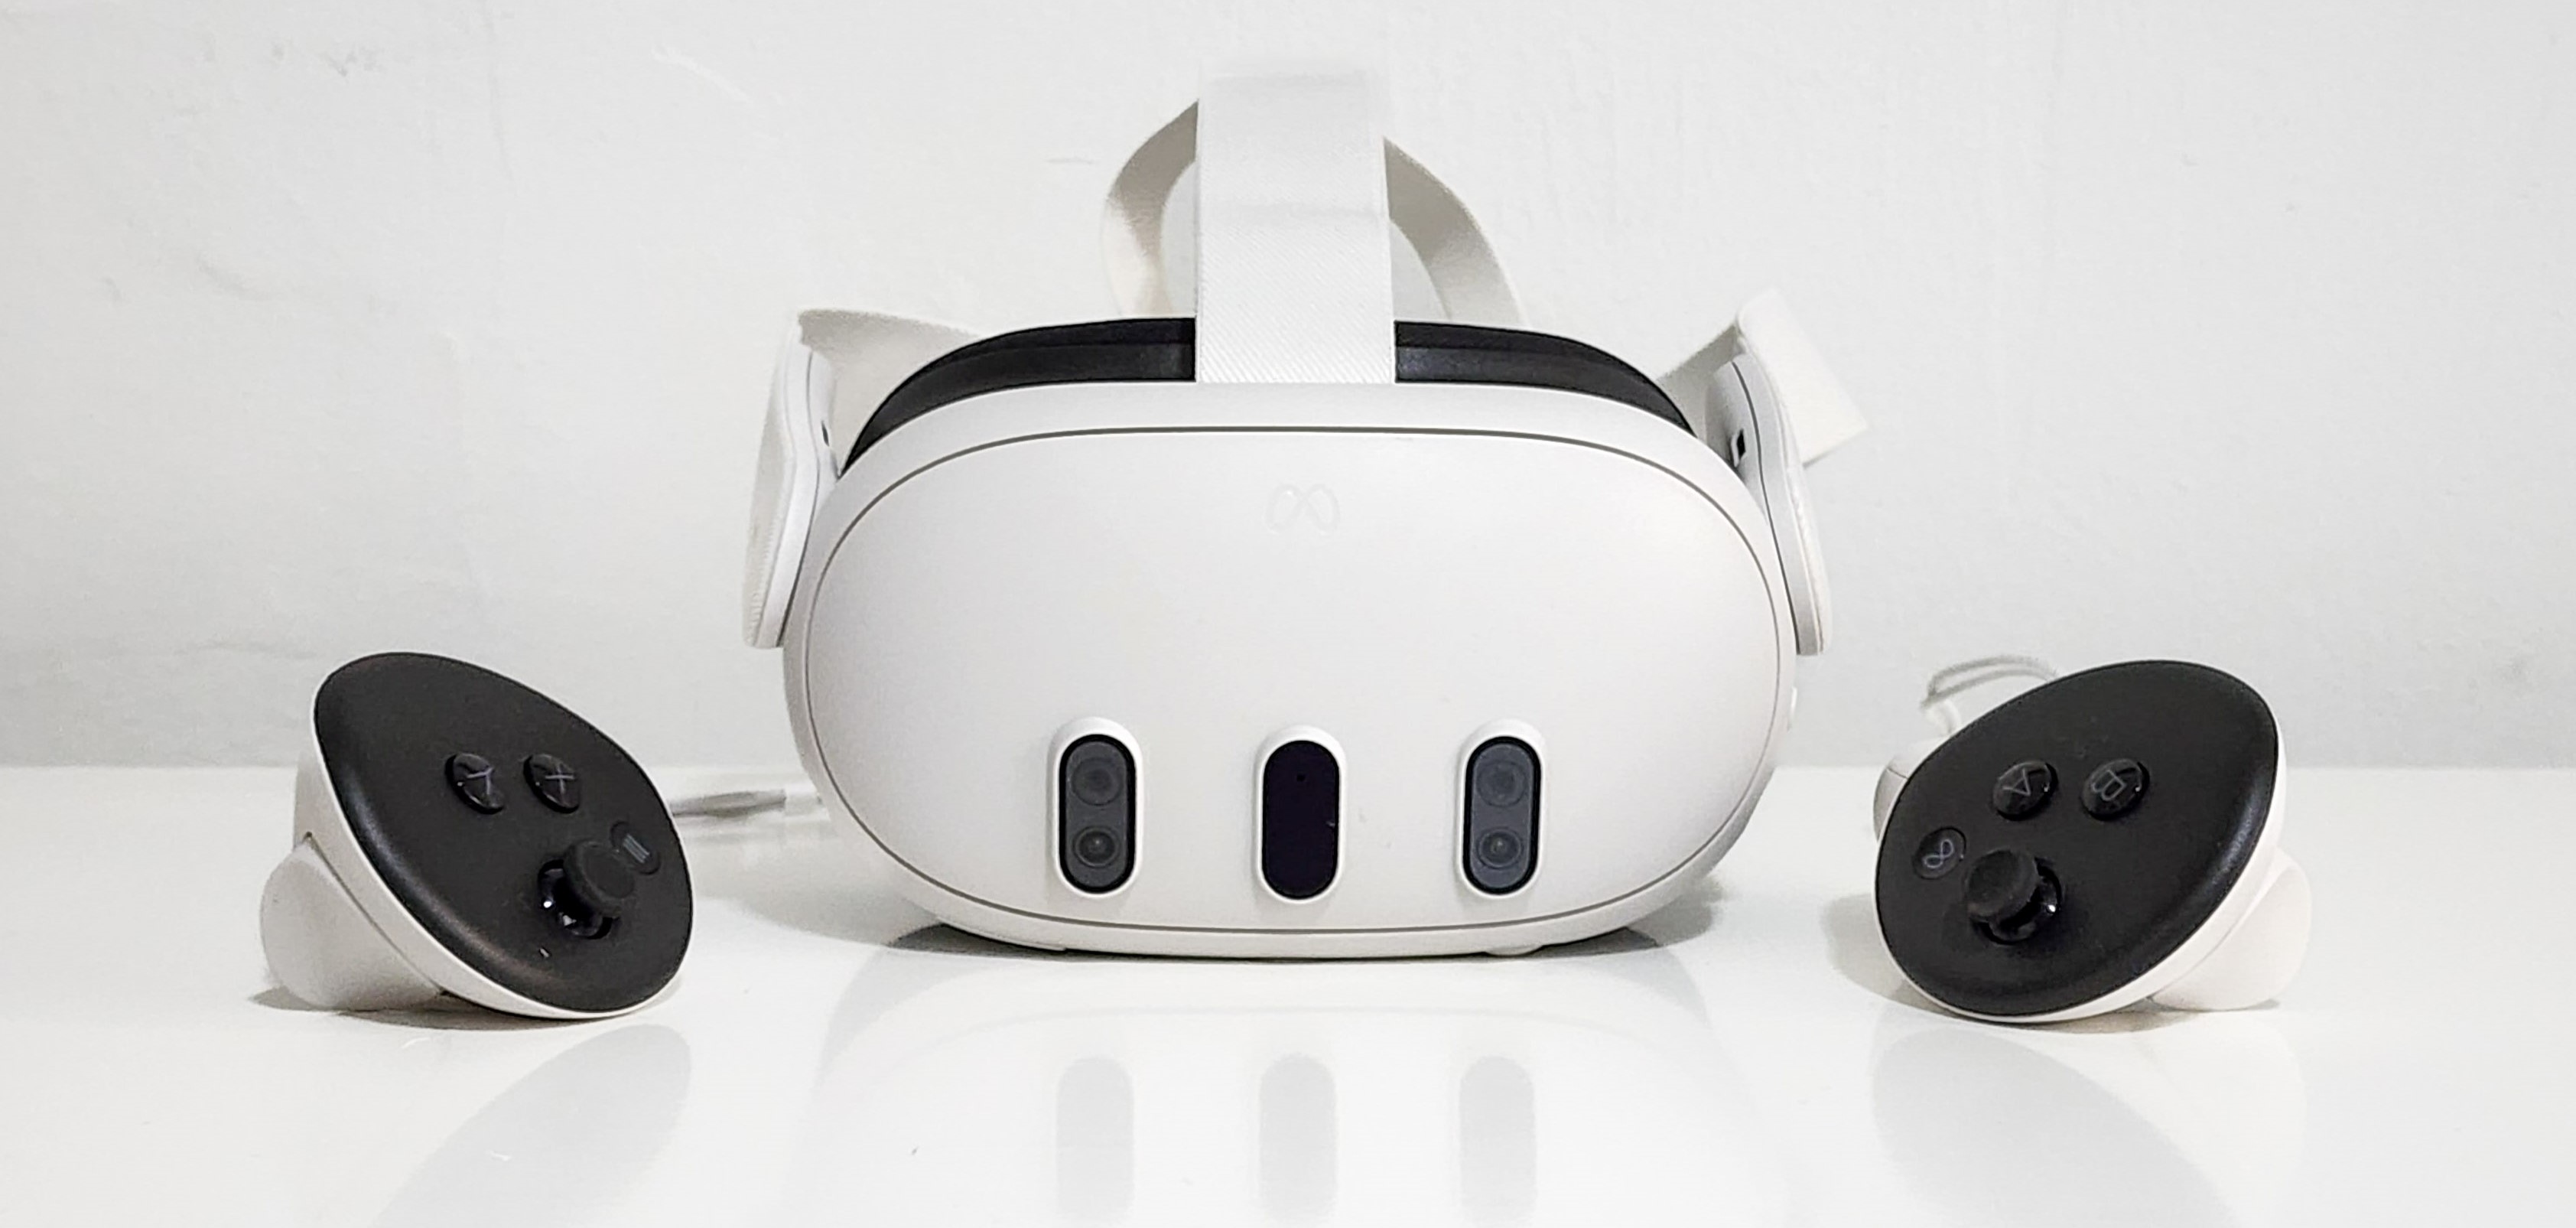
- Video passthrough AR headset platform for Module E passthrough AR tutorials (E6–E7).
- Color passthrough shows the physical workspace through headset cameras with Unity-composited overlays.
- Supports OpenXR, Unity OpenXR: Meta, AR Foundation 6.3, and XRI interaction (controllers, hands, ray, poke, grab, world-space UI).
- Standalone Android Build and Run on Quest for final validation; Quest Link / Meta Horizon Link for rapid preview where supported.
- Relevant to XFactory assembly, inspection, and training overlays that benefit from hands-free headset use with the real environment visible.
Magic Leap 2
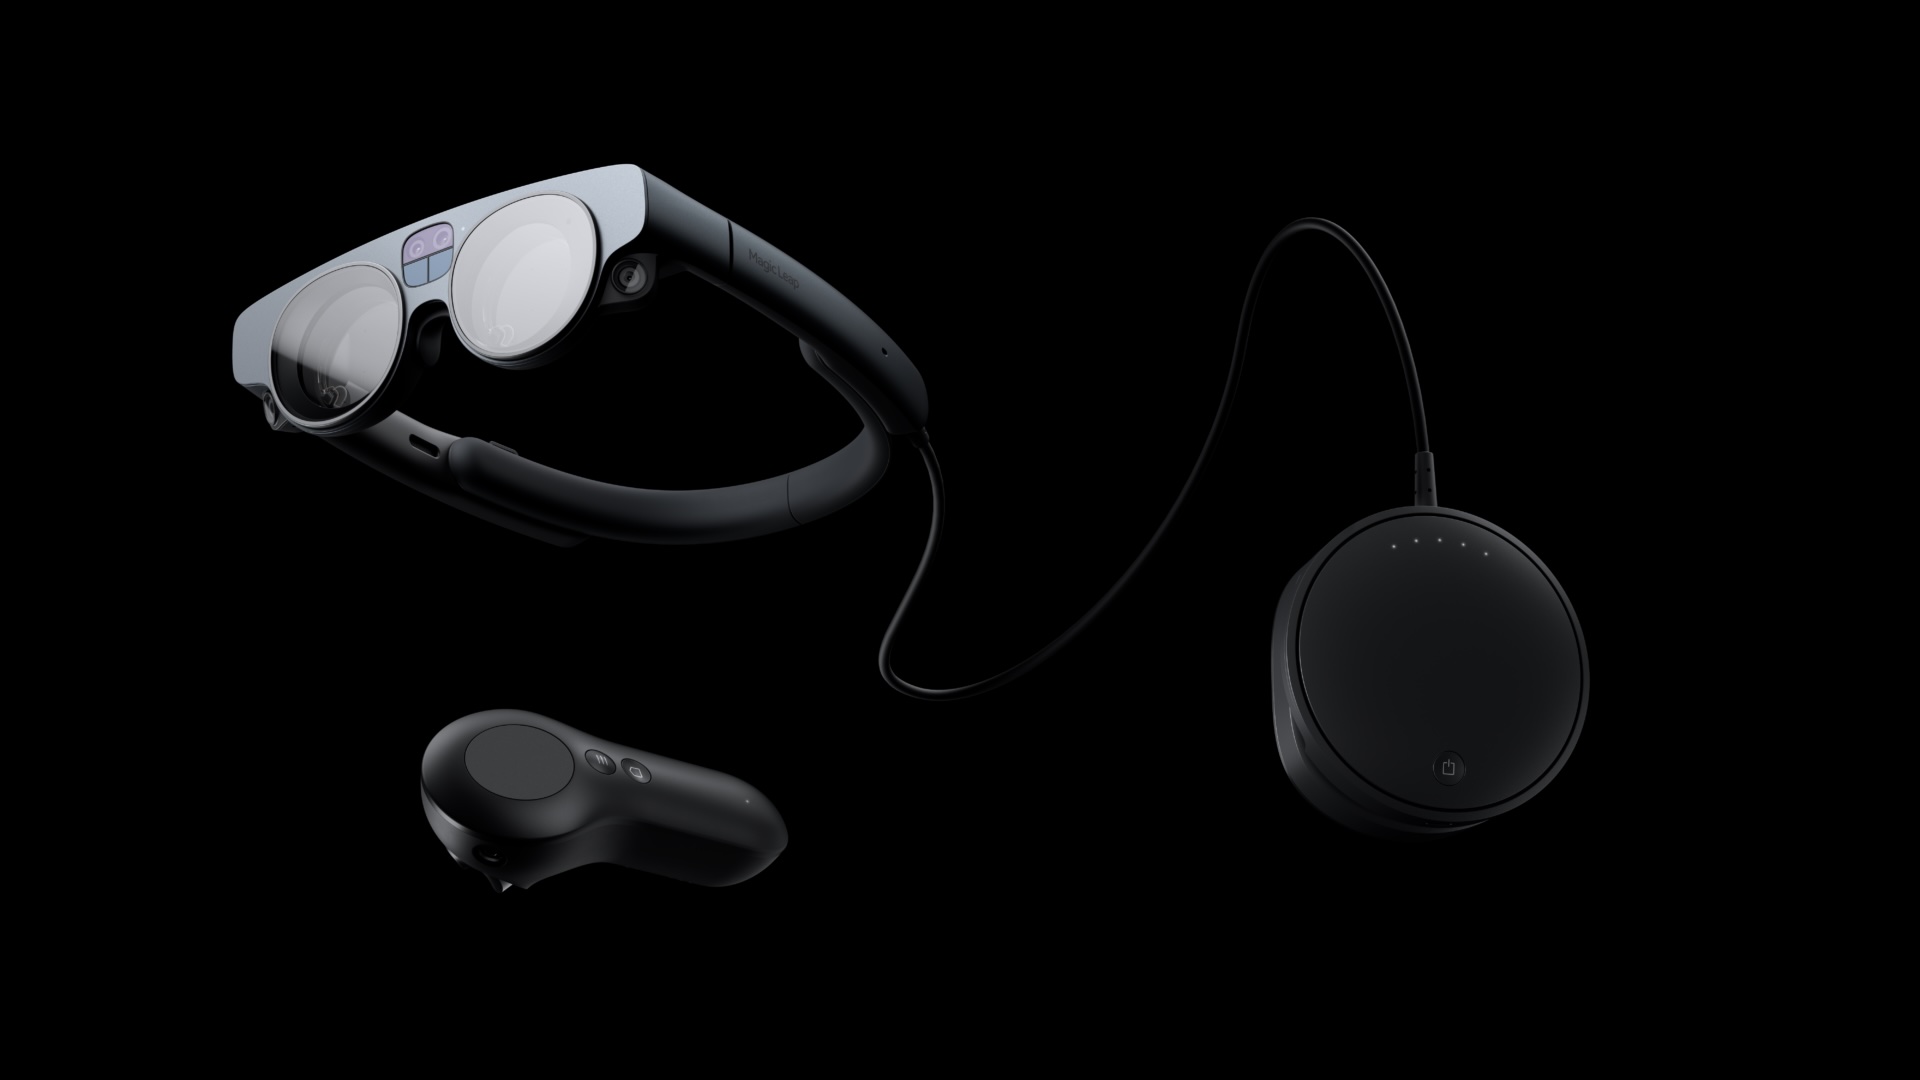
- Optical see-through AR headset for enterprise spatial computing reference.
- Supports natural hand tracking, gesture controls, and gaze tracking on supported configurations.
- Useful for comparing optical vs passthrough tradeoffs—not the hands-on tutorial target for this course.
Microsoft HoloLens 2
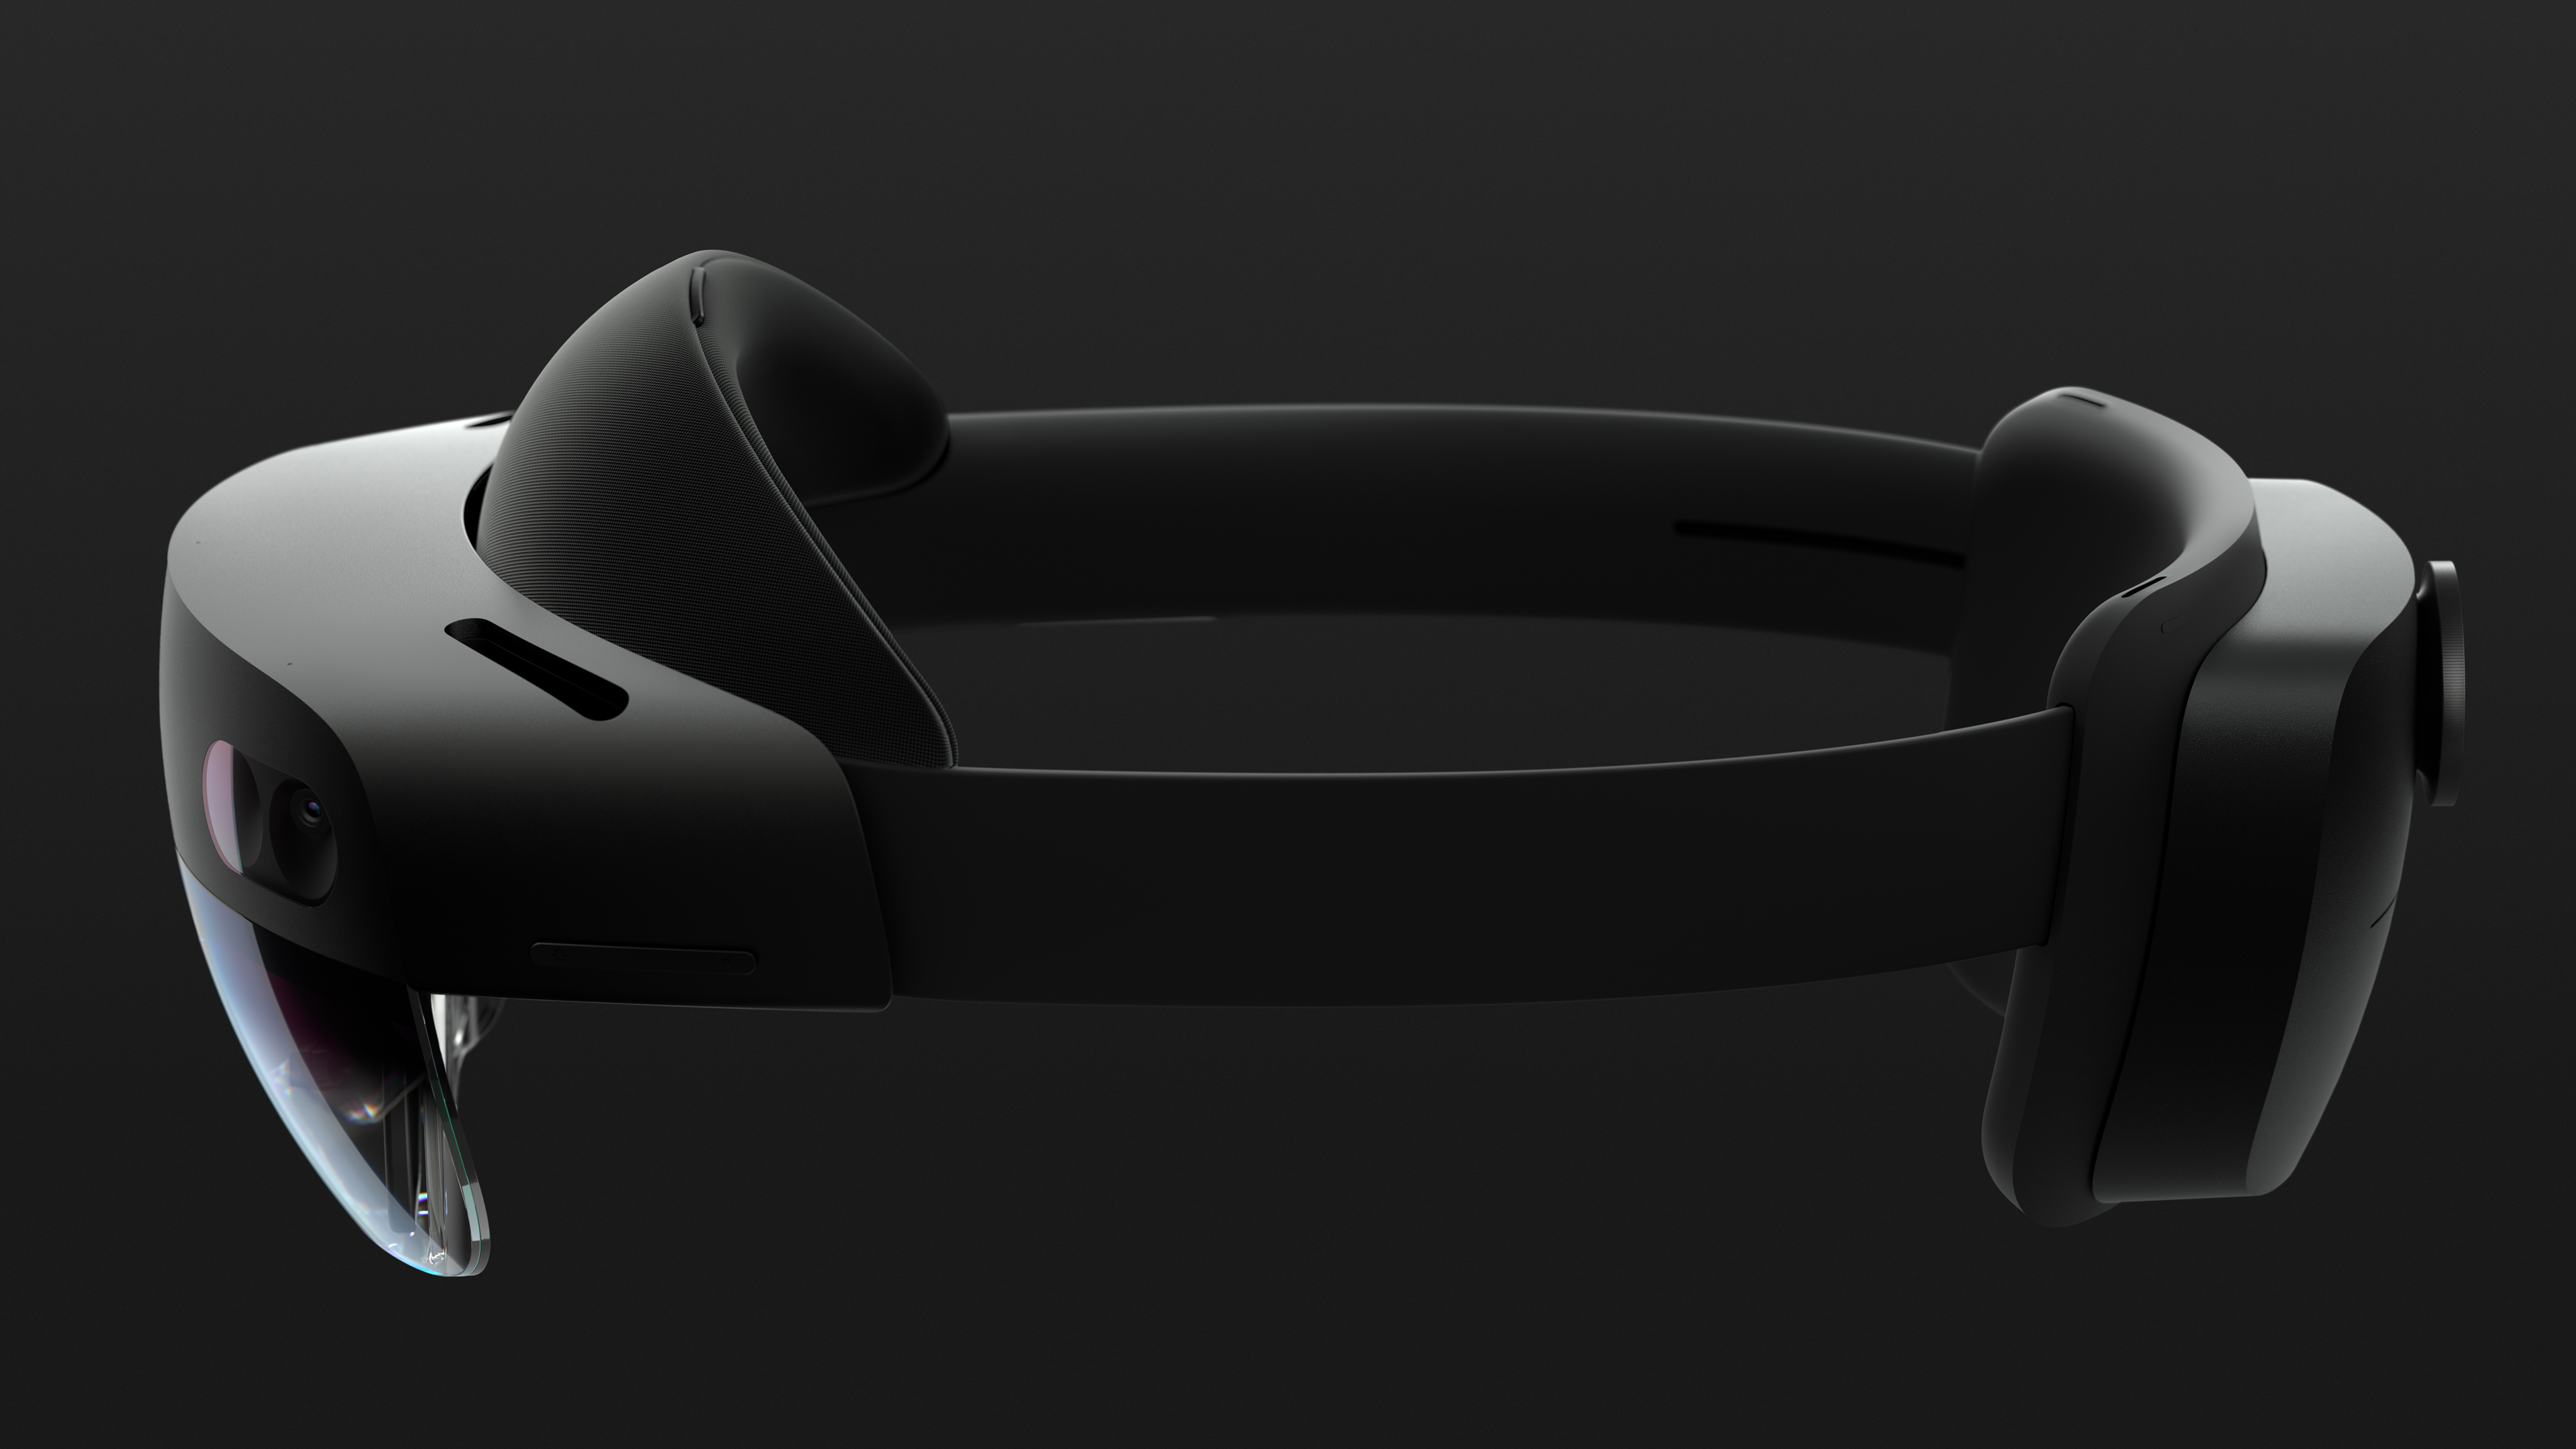
- Optical see-through AR headset widely adopted for commercial and research applications.
- Provides holographic overlays with spatial mapping; supports hand tracking, eye tracking, and voice on supported configurations.
- Context device for optical AR and MRTK patterns—not the Module E tutorial default.
Apple Vision Pro
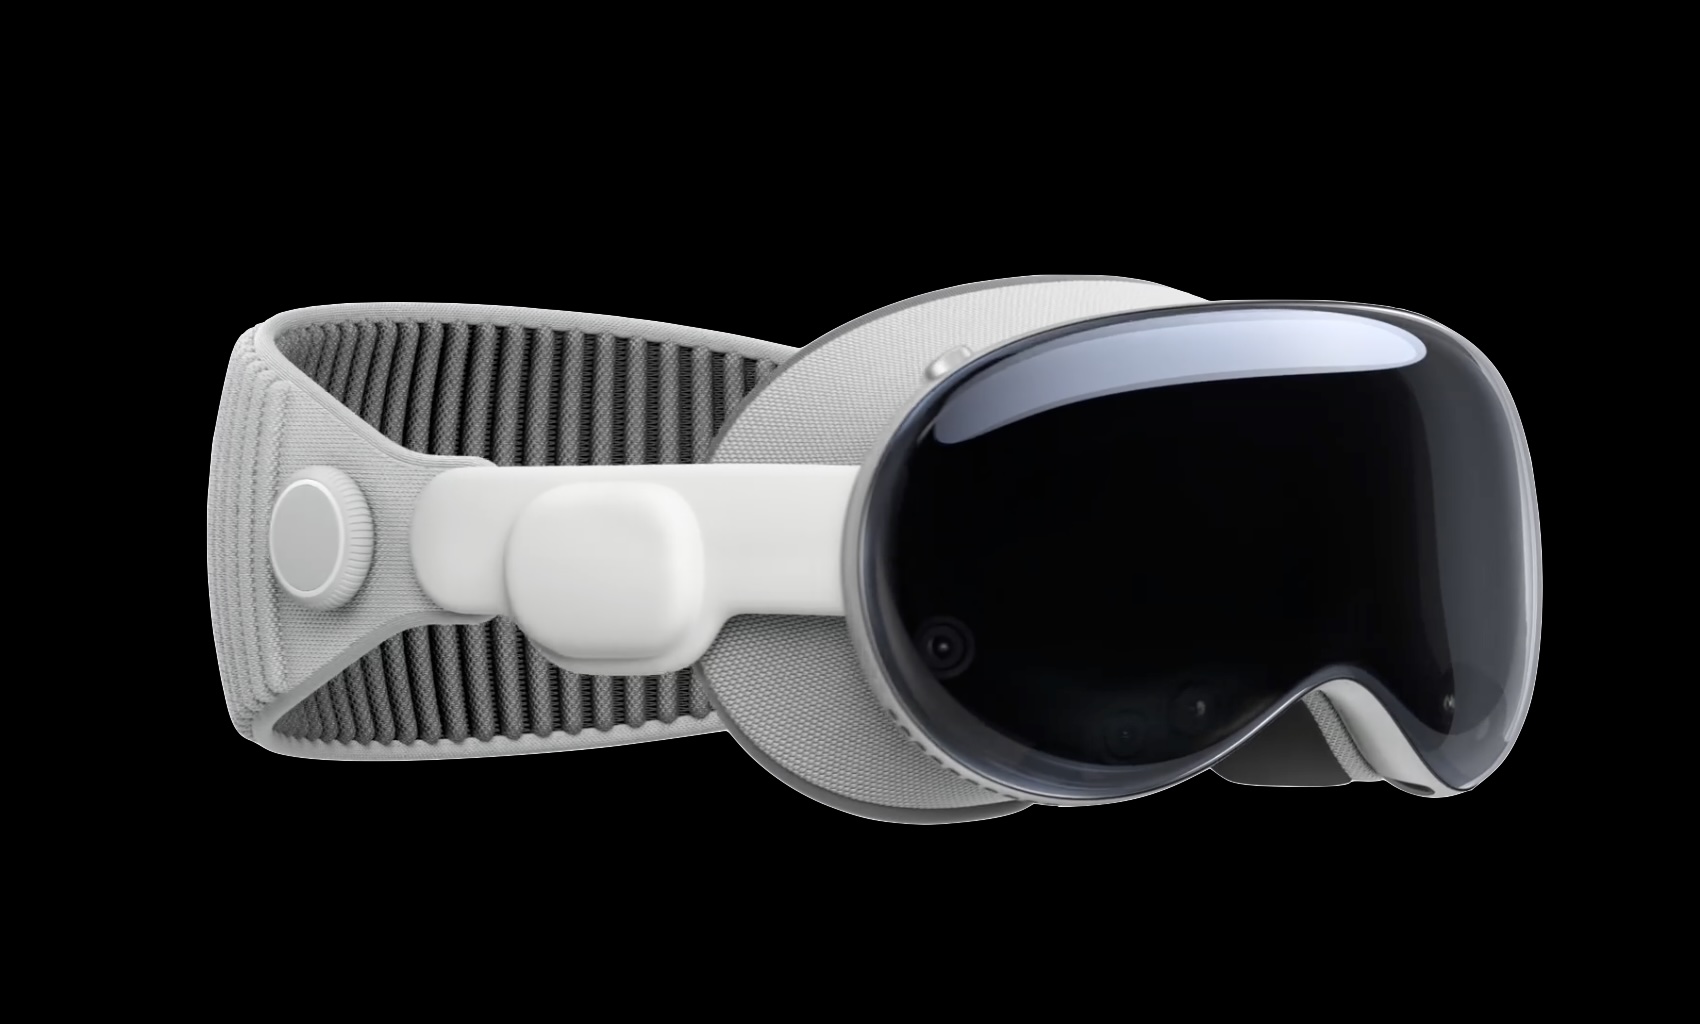
- High-fidelity passthrough AR device with advanced display and tracking on supported visionOS configurations.
- Integrates gesture and voice interaction; development uses Apple visionOS XR Plug-in where applicable.
- Comparison/context device—not the primary course tutorial target.
Varjo XR-4 Series
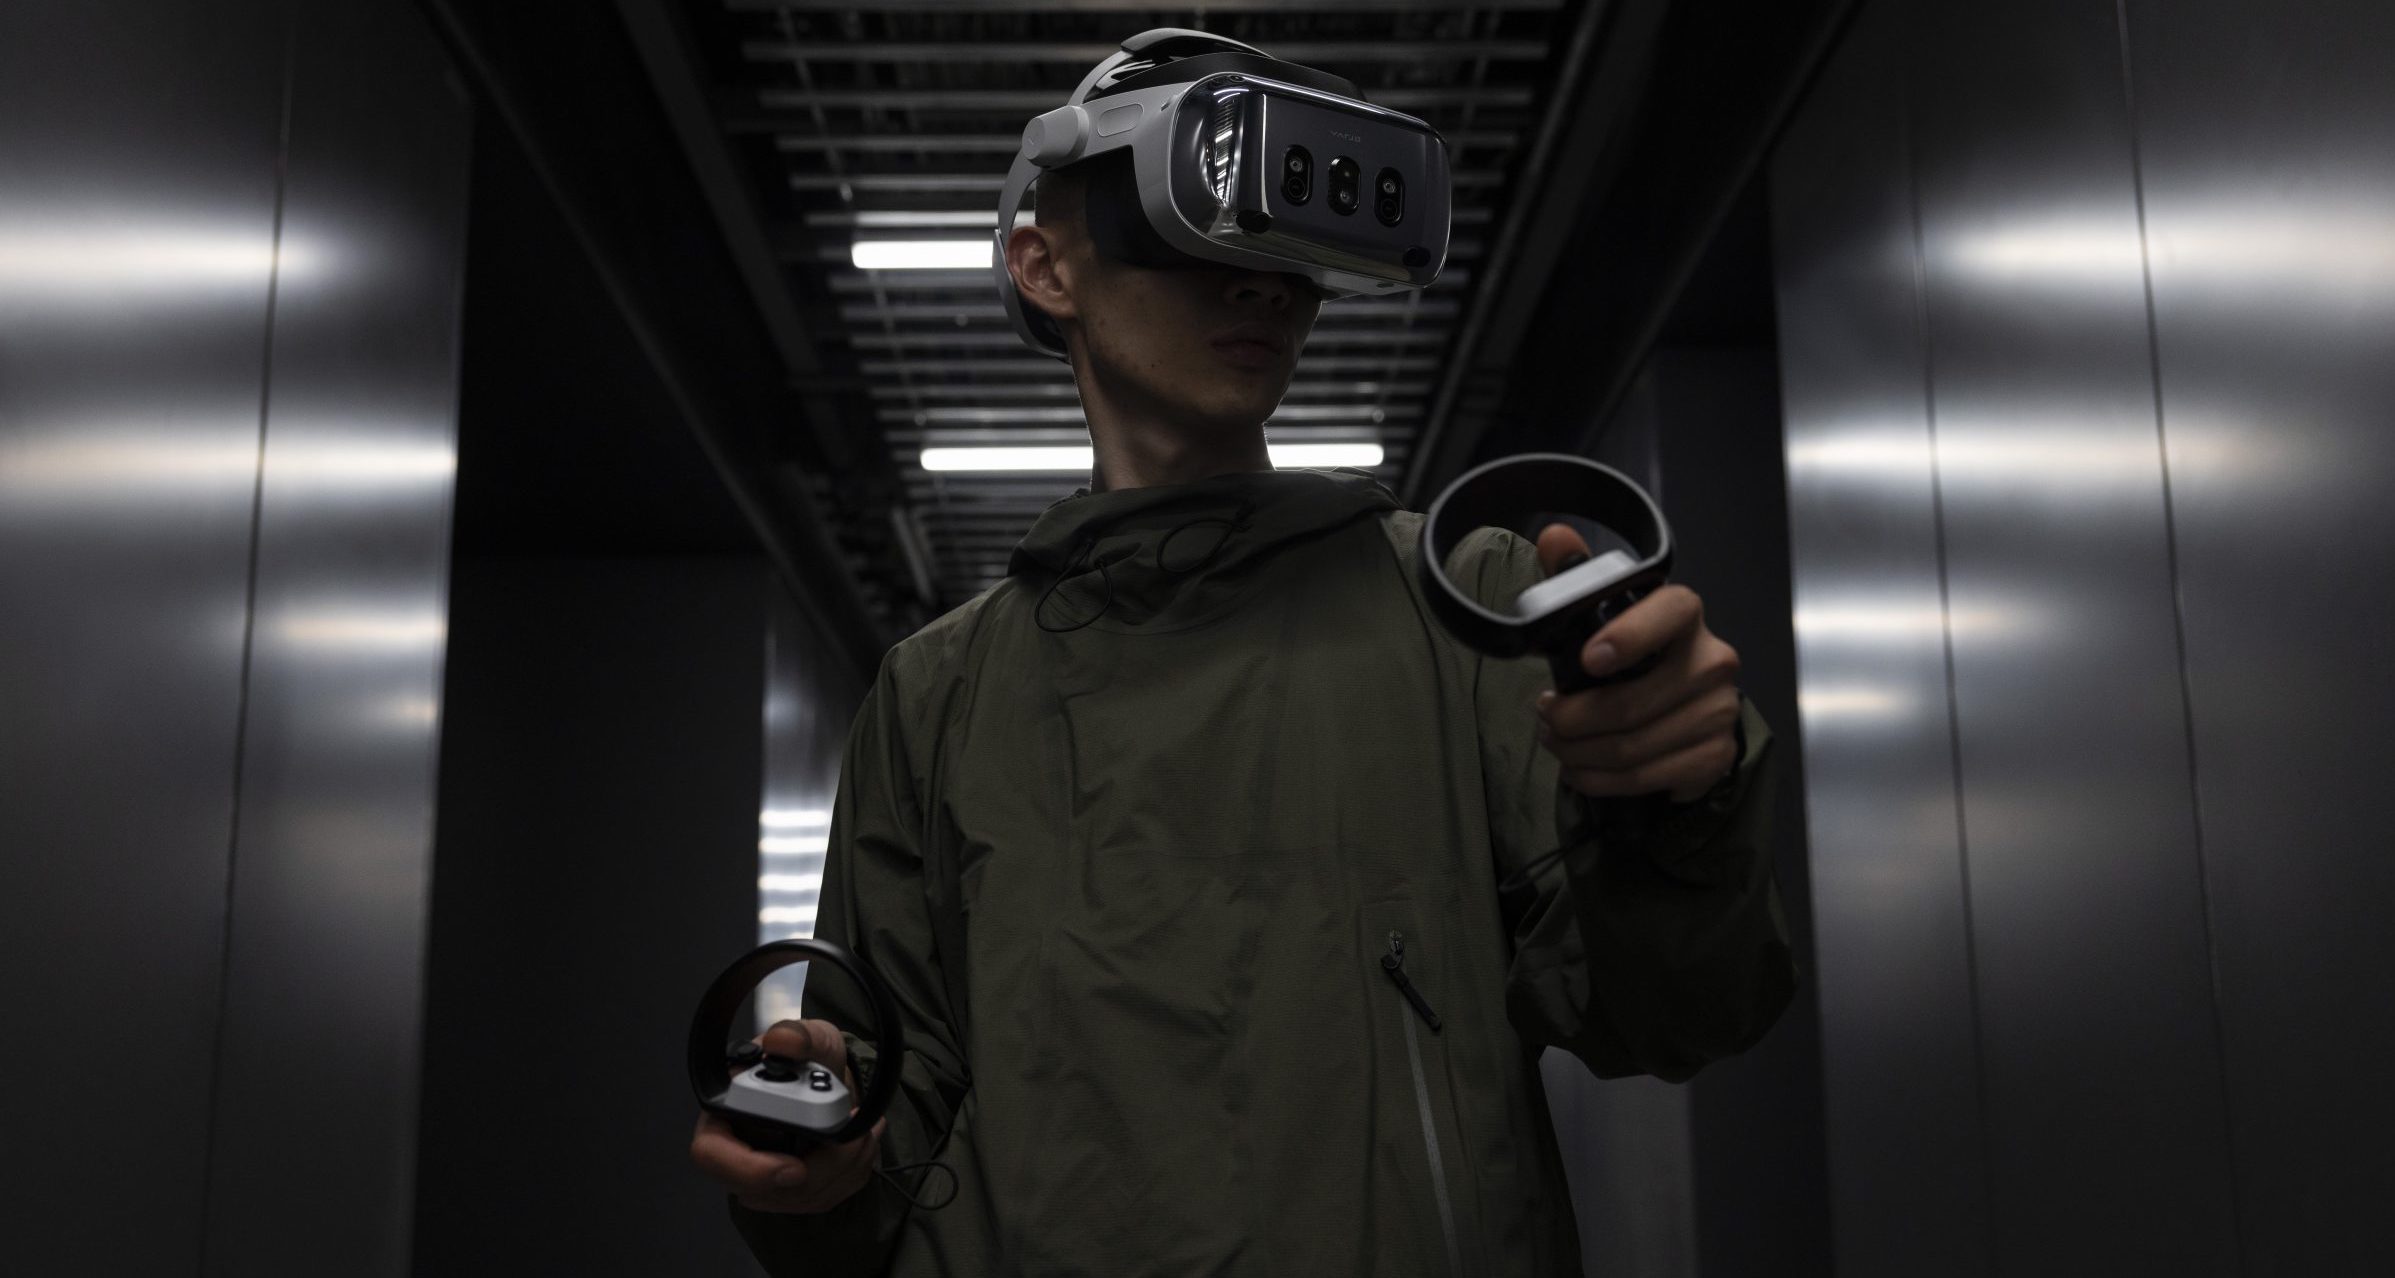
- High-end passthrough AR headset for industrial training, simulation, and design review.
- Photorealistic video passthrough with depth reconstruction for occlusion on supported configurations.
- Comparison/context device for advanced industrial visualization—not a Module E tutorial target.
This list is not exhaustive—other passthrough-capable headsets (e.g., HTC VIVE Focus Vision and PICO Ultra series) and optical see-through smart glasses exist, but capabilities, SDKs, and spatial-mapping support vary widely by device and are not covered in this session.
Why AR and Not Just VR?

VR excels at creating fully immersive environments for design reviews, safety training, and remote collaboration—especially when the real-world context isn’t accessible or needs to be simulated. However, AR offers something VR cannot: real-time insight and digital augmentation within the actual workspace. For engineers, technicians, and field workers, AR’s ability to overlay digital information on real machinery, environments, and people turns it into a critical tool—not a VR replacement, but a vital counterpart. Passthrough AR sits between VR and optical AR: it can reuse VR/XRI interaction patterns from Module D while bringing the physical workspace into the experience through camera passthrough.
In-Situ Immersive Augmentation
AR anchors digital content onto real-world objects—offering live, context-sensitive data right where the work is happening. This level of situational awareness is impossible to replicate in VR. What AR delivers that VR can’t:
- Spatially-Aligned Information: Schematics, annotations, or sensor readouts appear directly on the equipment. This allows technicians to interpret and act on data without needing to mentally translate from a separate screen or memory.
- Live Visualizations: Real-time data (e.g., heat, stress, telemetry) overlays components under actual load. This enables condition-based decisions based on true operating parameters, not static models or assumptions.
- Environmental Adaptation: AR responds to real lighting, geometry, and occlusion. Overlays adjust dynamically to ensure visibility and precision, even in cluttered or unpredictable environments.
Real-World Decision-Making
AR enables engineers to make faster, smarter decisions on the shop floor, eliminating guesswork.
- Instant Data Access: Fault alerts, part specifications, or diagnostic readouts appear next to the actual hardware. This minimizes downtime by eliminating the need to consult separate systems or documentation.
- Live Monitoring: See live telemetry on a pump or valve while standing beside it. It empowers users to validate sensor readings and equipment behavior without leaving the workspace.
- Shared Views: Multiple team members view synchronized overlays on the same equipment—reducing errors and improving communication. This fosters alignment during diagnostics or procedures, reducing handoff mistakes and speeding collaboration.
On-the-Job Skill Development
AR combines real tools with digital guidance, helping trainees learn by doing—without compromising safety or efficiency.
- Procedural Guidance: Floating arrows and tooltips direct each step during a repair or calibration task. This reduces cognitive load for trainees and boosts retention by tying instructions directly to real-world actions.
- Real-Time Feedback: Systems alert the user when a bolt is over-torqued or an assembly step is skipped. These just-in-time corrections help reinforce best practices and reduce training errors early in the learning curve.
- Collaborative Training: Senior engineers can mentor side-by-side, both seeing the same digital overlays. It enables natural, face-to-face coaching with shared spatial references—something remote VR sessions can’t fully replicate.
Interaction “In Context”
Rather than reviewing a CAD model in a virtual room, AR allows engineers to test it on the factory floor—where it will actually be installed.
- Digital-Physical Fit Checks: Snap a virtual bracket to a real engine block to detect clashes or clearance issues. This allows for real-world validation before a single part is machined, catching issues that CAD alone may miss.
- Real-Time Design Adjustments: Tweak dimensions and instantly preview the results in the live workspace. Designers can iterate rapidly while receiving immediate spatial feedback from the actual environment.
- Error Prevention: Spot misalignments or ergonomic conflicts before manufacturing begins—saving time and tooling costs. AR bridges the gap between digital intent and physical execution, reducing late-stage surprises and rework.
Where AR Lags Behind VR
Despite its strengths, AR—especially optical see-through and passthrough headsets—still trails VR in some areas of visual quality, stability, and ecosystem maturity.
| AR Limitation | Engineering Impact | VR Advantage |
|---|---|---|
| Narrow Field-of-View (optical AR) | Users must turn their heads to view overlays; limits spatial awareness. | VR offers wide FOV with full environmental control. |
| Passthrough camera latency | Mediated world view can lag behind head motion; affects precision tasks. | VR world is fully synthetic with predictable timing. |
| Depth perception mismatch | Passthrough and optical overlays may not match true object depth. | VR depth cues are internally consistent (though not real-world accurate). |
| Camera image quality in low light | Passthrough AR degrades in dim or high-contrast lighting. | VR scenes are unaffected by ambient lighting. |
| Tracking instability | Reflective, low-texture, or vibrating surfaces cause anchor drift. | VR relies on fully virtual worlds—no real-world drift. |
| Occlusion/meshing limitations | Digital objects may clip or fail to hide behind real geometry. | VR controls every occluder in the scene. |
| Safety risk (passthrough AR) | User’s view of hazards is mediated by cameras and displays. | VR removes real-world hazards but removes real context too. |
| Feature support varies | Provider, OS, and device determine available AR Foundation features. | OpenXR/VR stacks are more consistent within a given headset class. |
| Lower compute power (mobile AR) | Phones/tablets can struggle with dense meshes or heavy VFX. | PC/console VR can render high-polygon scenes in real time. |
| UX overload risks | Overlaying too much data can overwhelm users in the real workspace. | VR lets designers control every element of the scene and pacing. |
Use AR for tasks grounded in the physical world—like inspections, assembly, prototyping, and spatial walkthroughs—where real-time data and context are critical. Use VR for immersive training, design visualization, and simulations in dangerous or remote environments where full control and visual fidelity are essential. Bottom line: AR and VR solve different problems. Together, they form a powerful workflow from real-world execution to immersive simulation.
Key Takeaways
- AR is strongest when digital content is anchored to meaningful real-world context—not when technology is showcased for its own sake.
- AR Foundation provides a shared Unity layer, but provider plug-ins (ARKit, ARCore, Unity OpenXR: Meta, visionOS, OpenXR) determine actual feature support.
- This course keeps mobile AR (ARKit/ARCore) while using Meta Quest passthrough AR as the primary headset development path.
- Optical see-through AR and passthrough AR have different strengths, limitations, and safety concerns—choose the platform that fits the task.
- Engineering AR must be validated for scale, registration, occlusion, comfort, and task safety on the target device—not only in XR Simulation.